DIY Solar Light
I’m taking a slight variation from my usual topics with this post. In addition to enjoying my Mustang, I have spent most of this summer building a patio with a pergola over it. The bulk of the construction is done and I am now working on getting the small details just right. If you know me at all, this shouldn’t surprise you.
After using the patio several times we felt we needed some light over the table that sits under the pergola in order to fully enjoy using it after dark. Running electricity to it seemed to be too large of an undertaking at this point. Some solar walk lights I just installed were doing a good job lighting the border of the patio and they were running on free electricity. Given the cost of energy, solar seemed to be a good way to go. Unfortunately, no solar light seemed to be available which combined the type of lighting fixture we needed (hanging), adequate brightness and the ability to have a solar panel detached from the light itself. The light needed to hang underneath the center of the pergola and we have shades installed between the beams of the pergola which would shade the light making it difficult to get adequate sun to an attached solar panel.
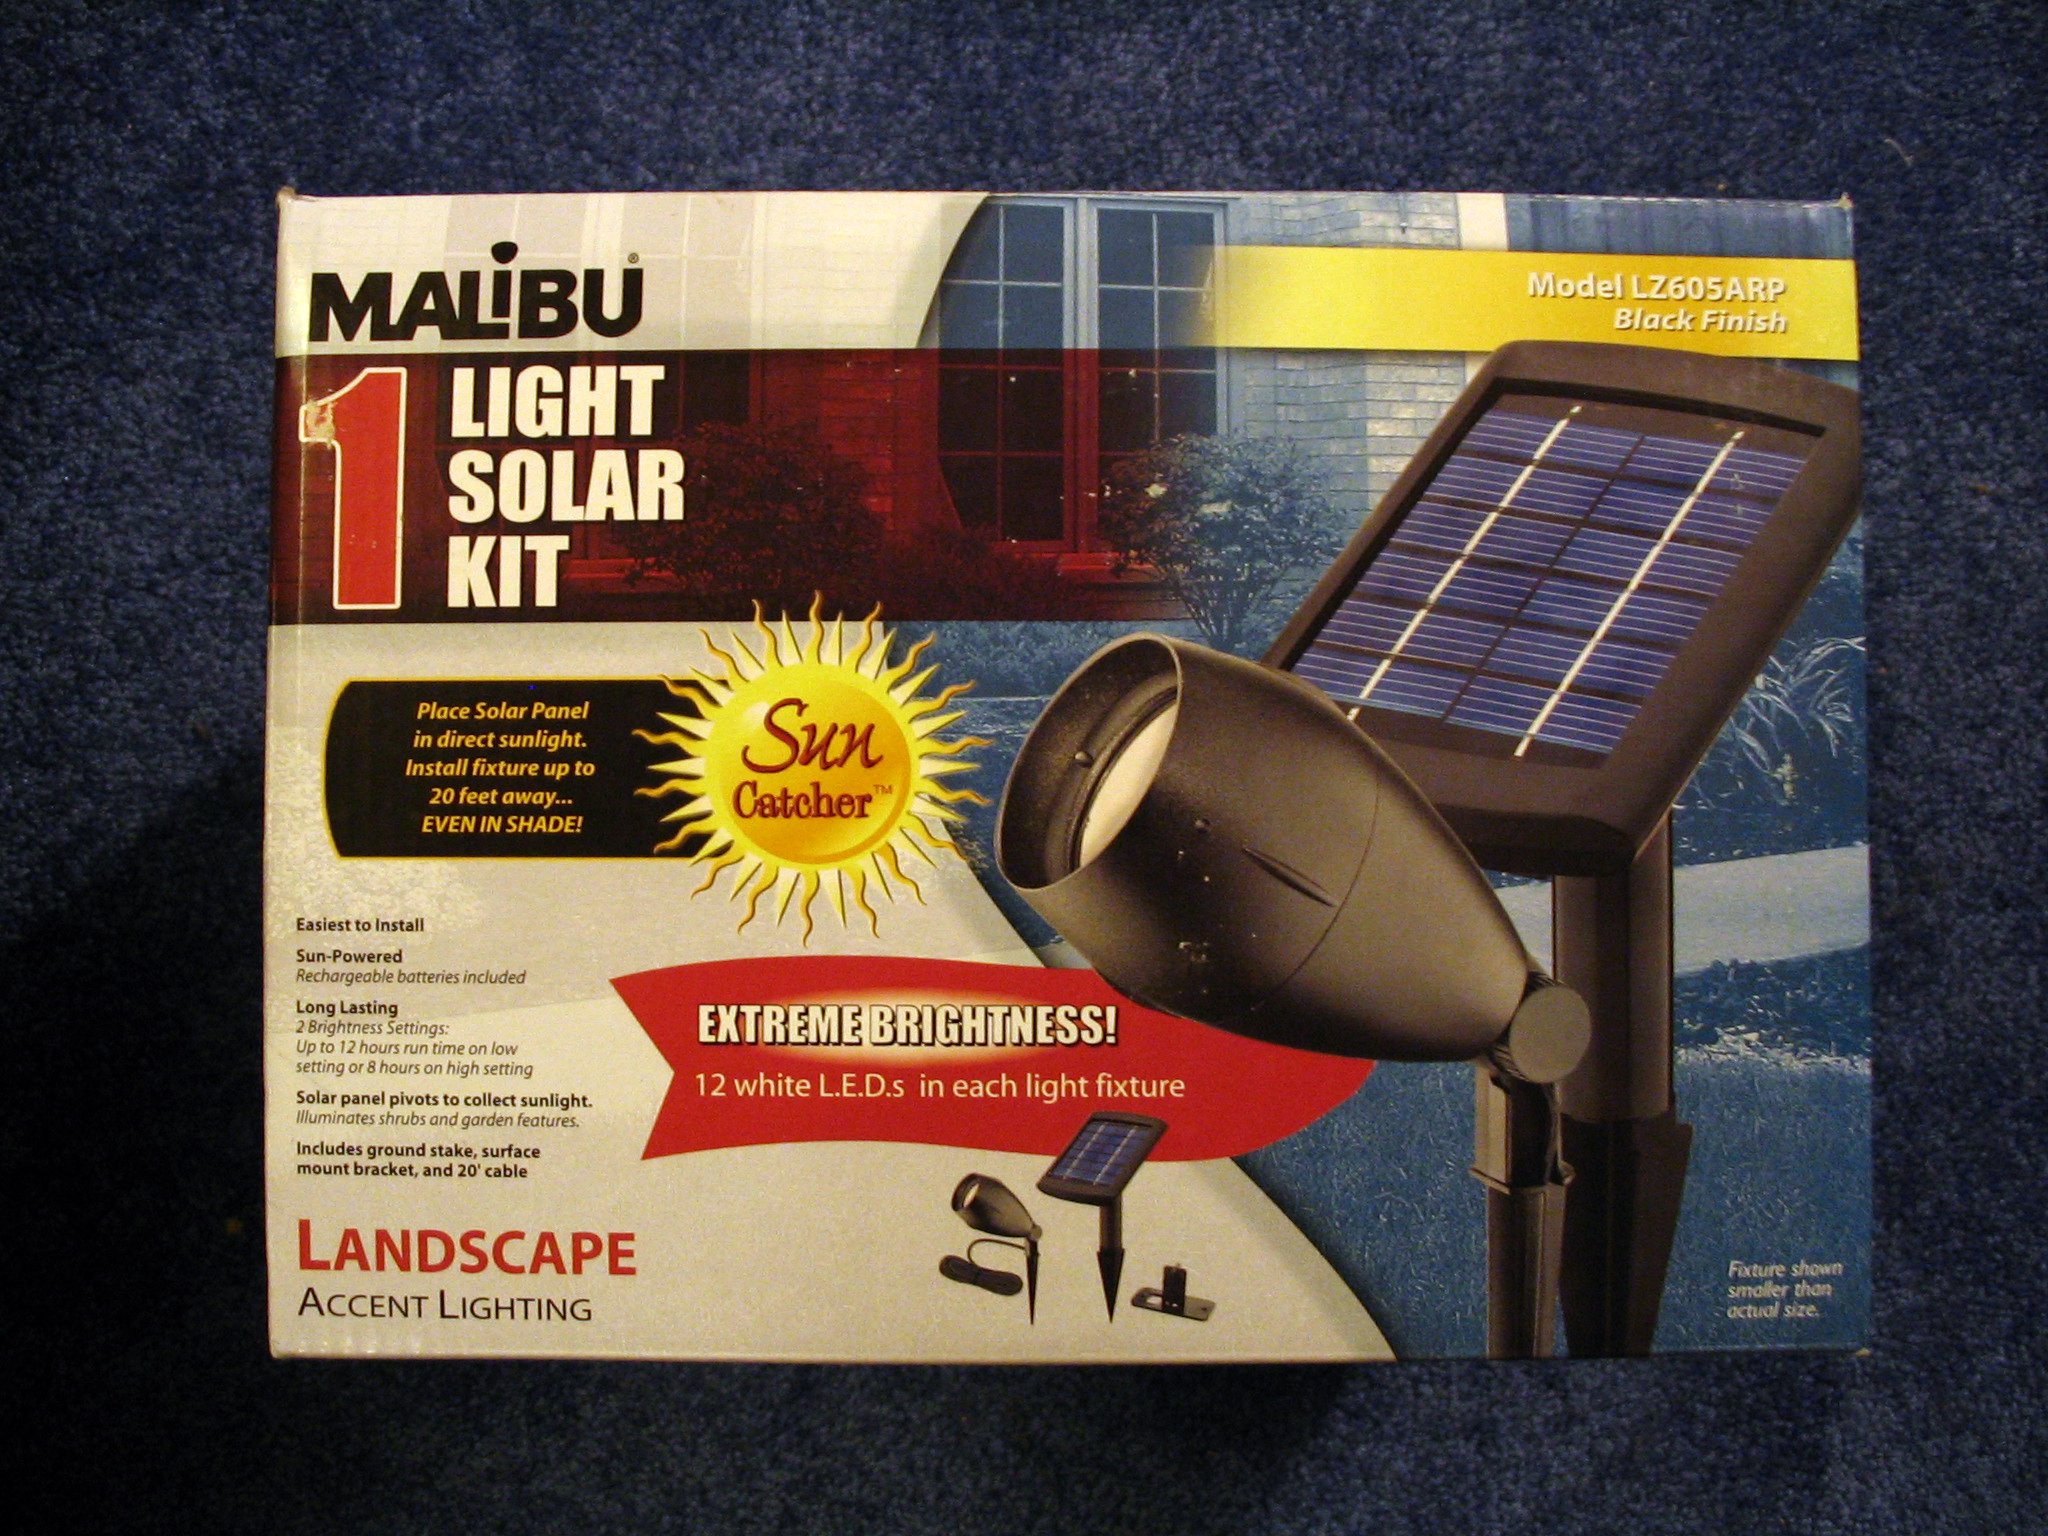
The approach I took was to build a light myself by converting a standard electric fixture to solar. I was motivated in this endevor by Christopher Malloy’s article on his approach to use off-the-shelf products to build a custom solar lighting solution. After some searching, I settled on a solar floodlight by Malibu to base my light on. I found it at Home Depot. It was an “extreme brightness” floodlight. (#LZ605ARP) . The first light I tried was a standard floodlight (#LZ415). Its 3 LEDs did not seem bright enought and I figured I would need to use at least 3 to get the light level I desired. They were $25 a piece so the cost would be high. Then I spotted the LZ605ARP which has 12 LEDs and two levels of brightness. A search of the Mailbu web site turned up no information on the light. It cost just under $50.
Next, the hanging fixture was chosen. For this, a standard electric fixture was searched for. The selection was not that great. Most overhead outdoor lights are intended to be mounted to a ceiling. With no ceiling above, a ceiling mount light would be problematic since the top of one is generally not weatherproof. Fixtures that could be hung generally were intended not to be hung in the true sense but attached to a wall mount bracket. For this reason they often had one solid side (the one that would face the wall they were mounted on) or a solid bottom. After some searching a pole mount fixture was choosen. This fixture had an upper housing that was mounted to a lower base panel that ultimately attached to the pole. The upper housing could exist without the lower panel. An added benefit was that the lower panel was where the standard electric fixture was mounted which made removing all of the components that supported the electric light very easy.
The first step was to deconstruct the solar light. There was a warning in the instructions that come with it that it should not be modified or reparied. So much for that. Its metal housing was much nicer and more modular than the LZ415 which had a plastic housing and looked harded to extract the pieces that I needed. It was a shame to have no use for the light housing since it was so solidly made.
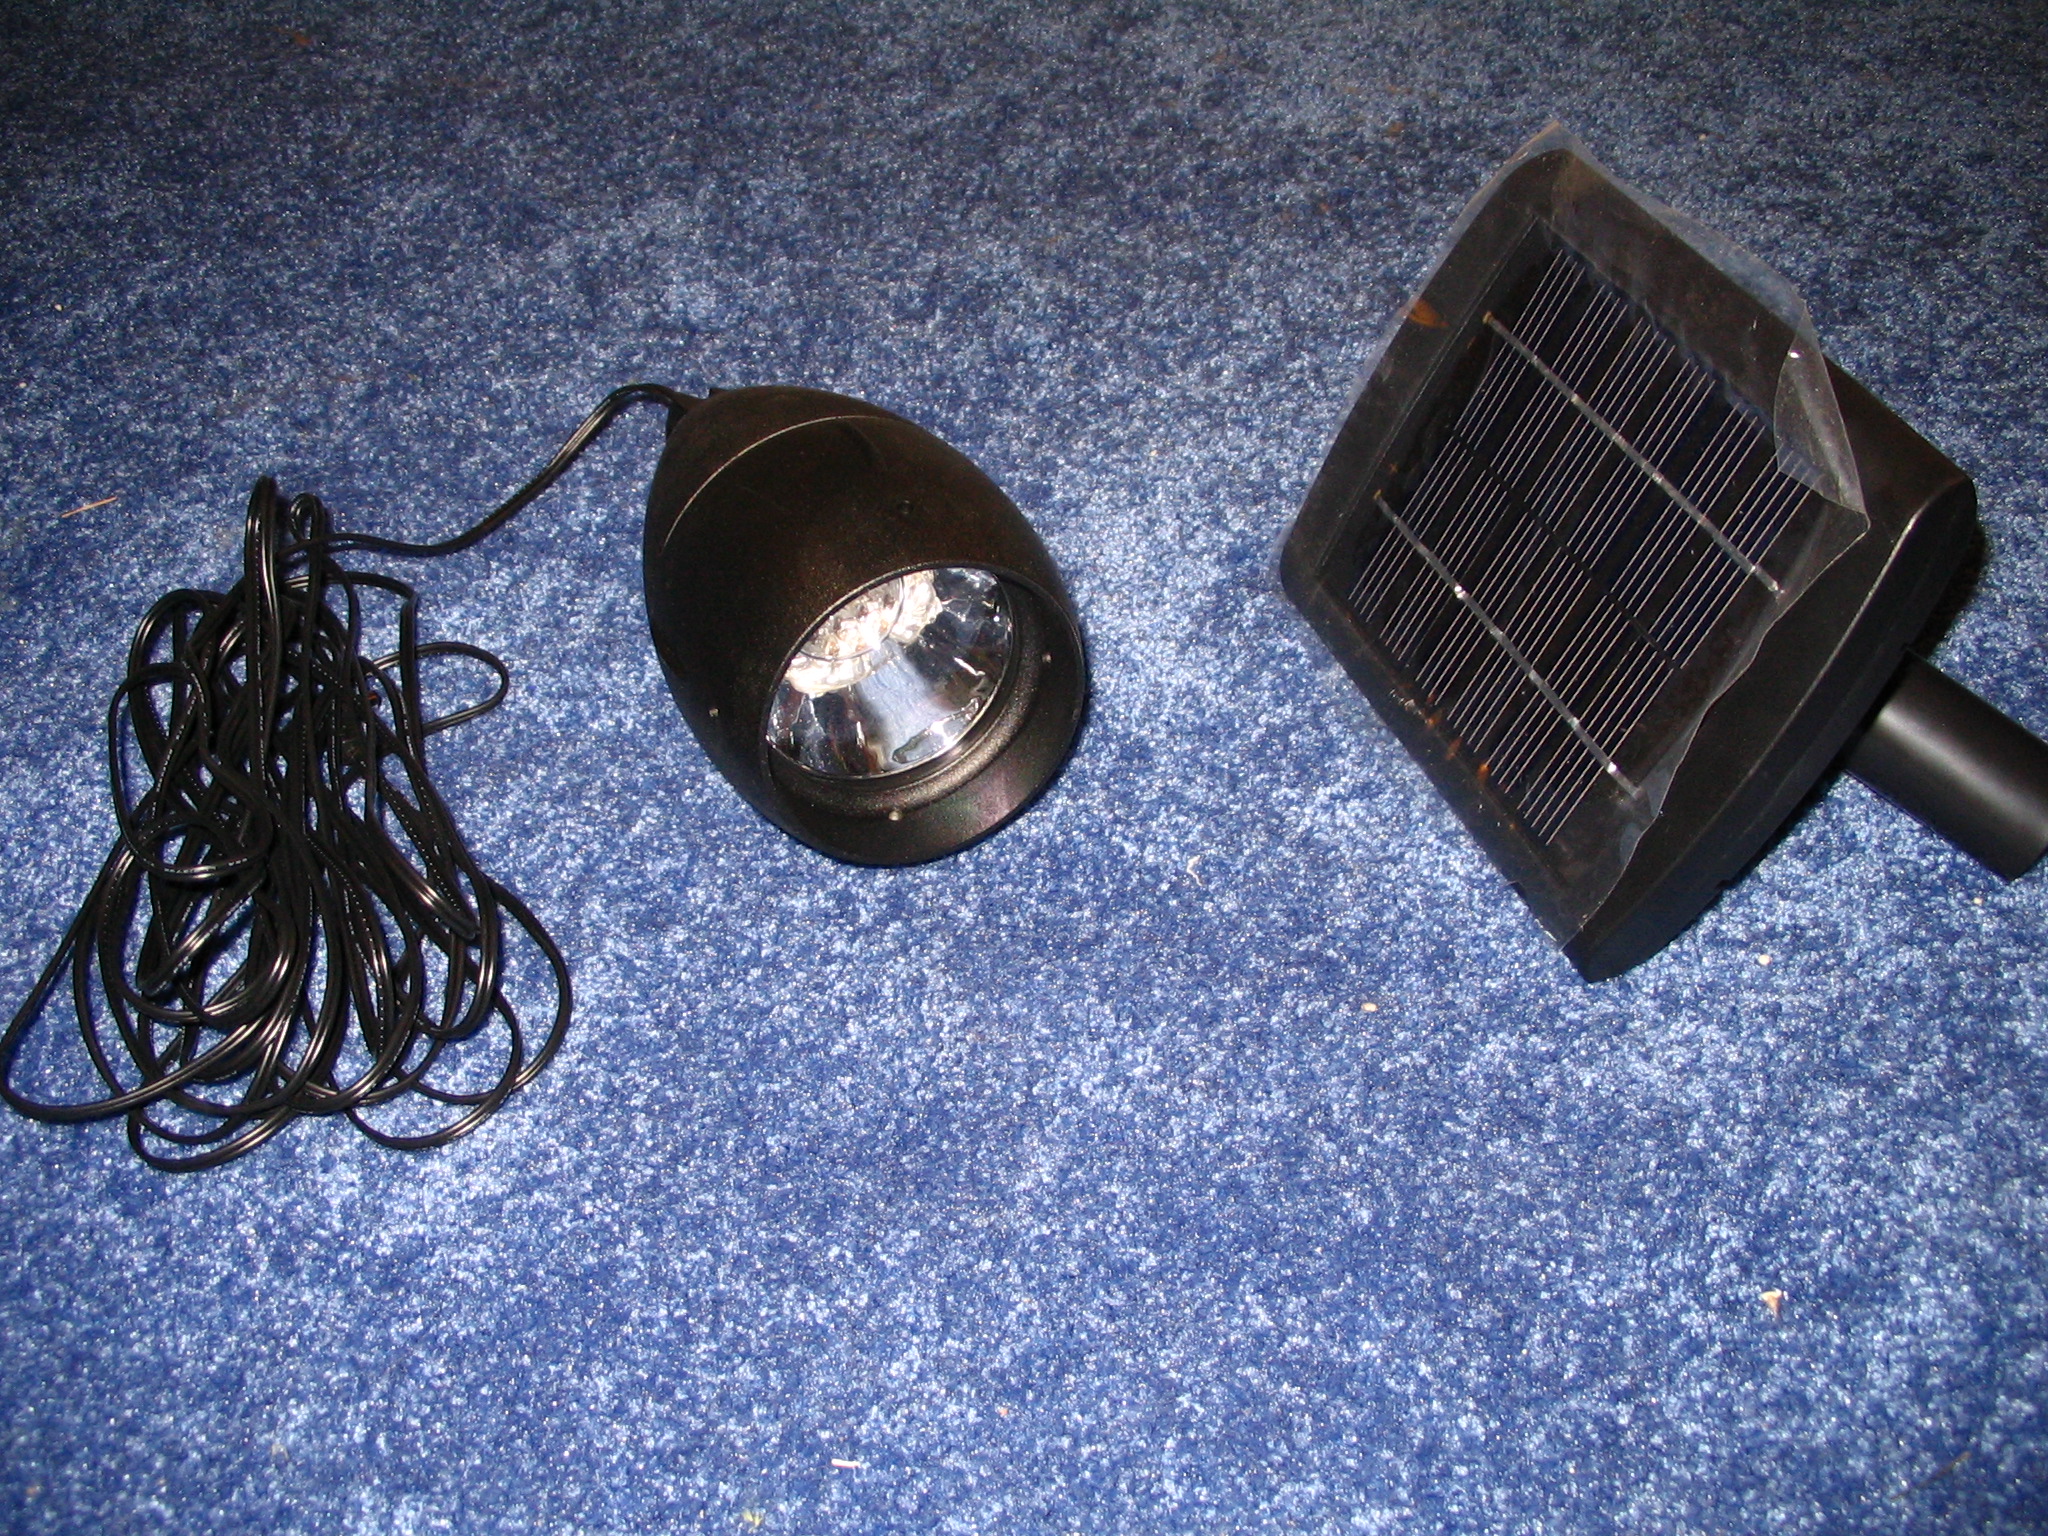
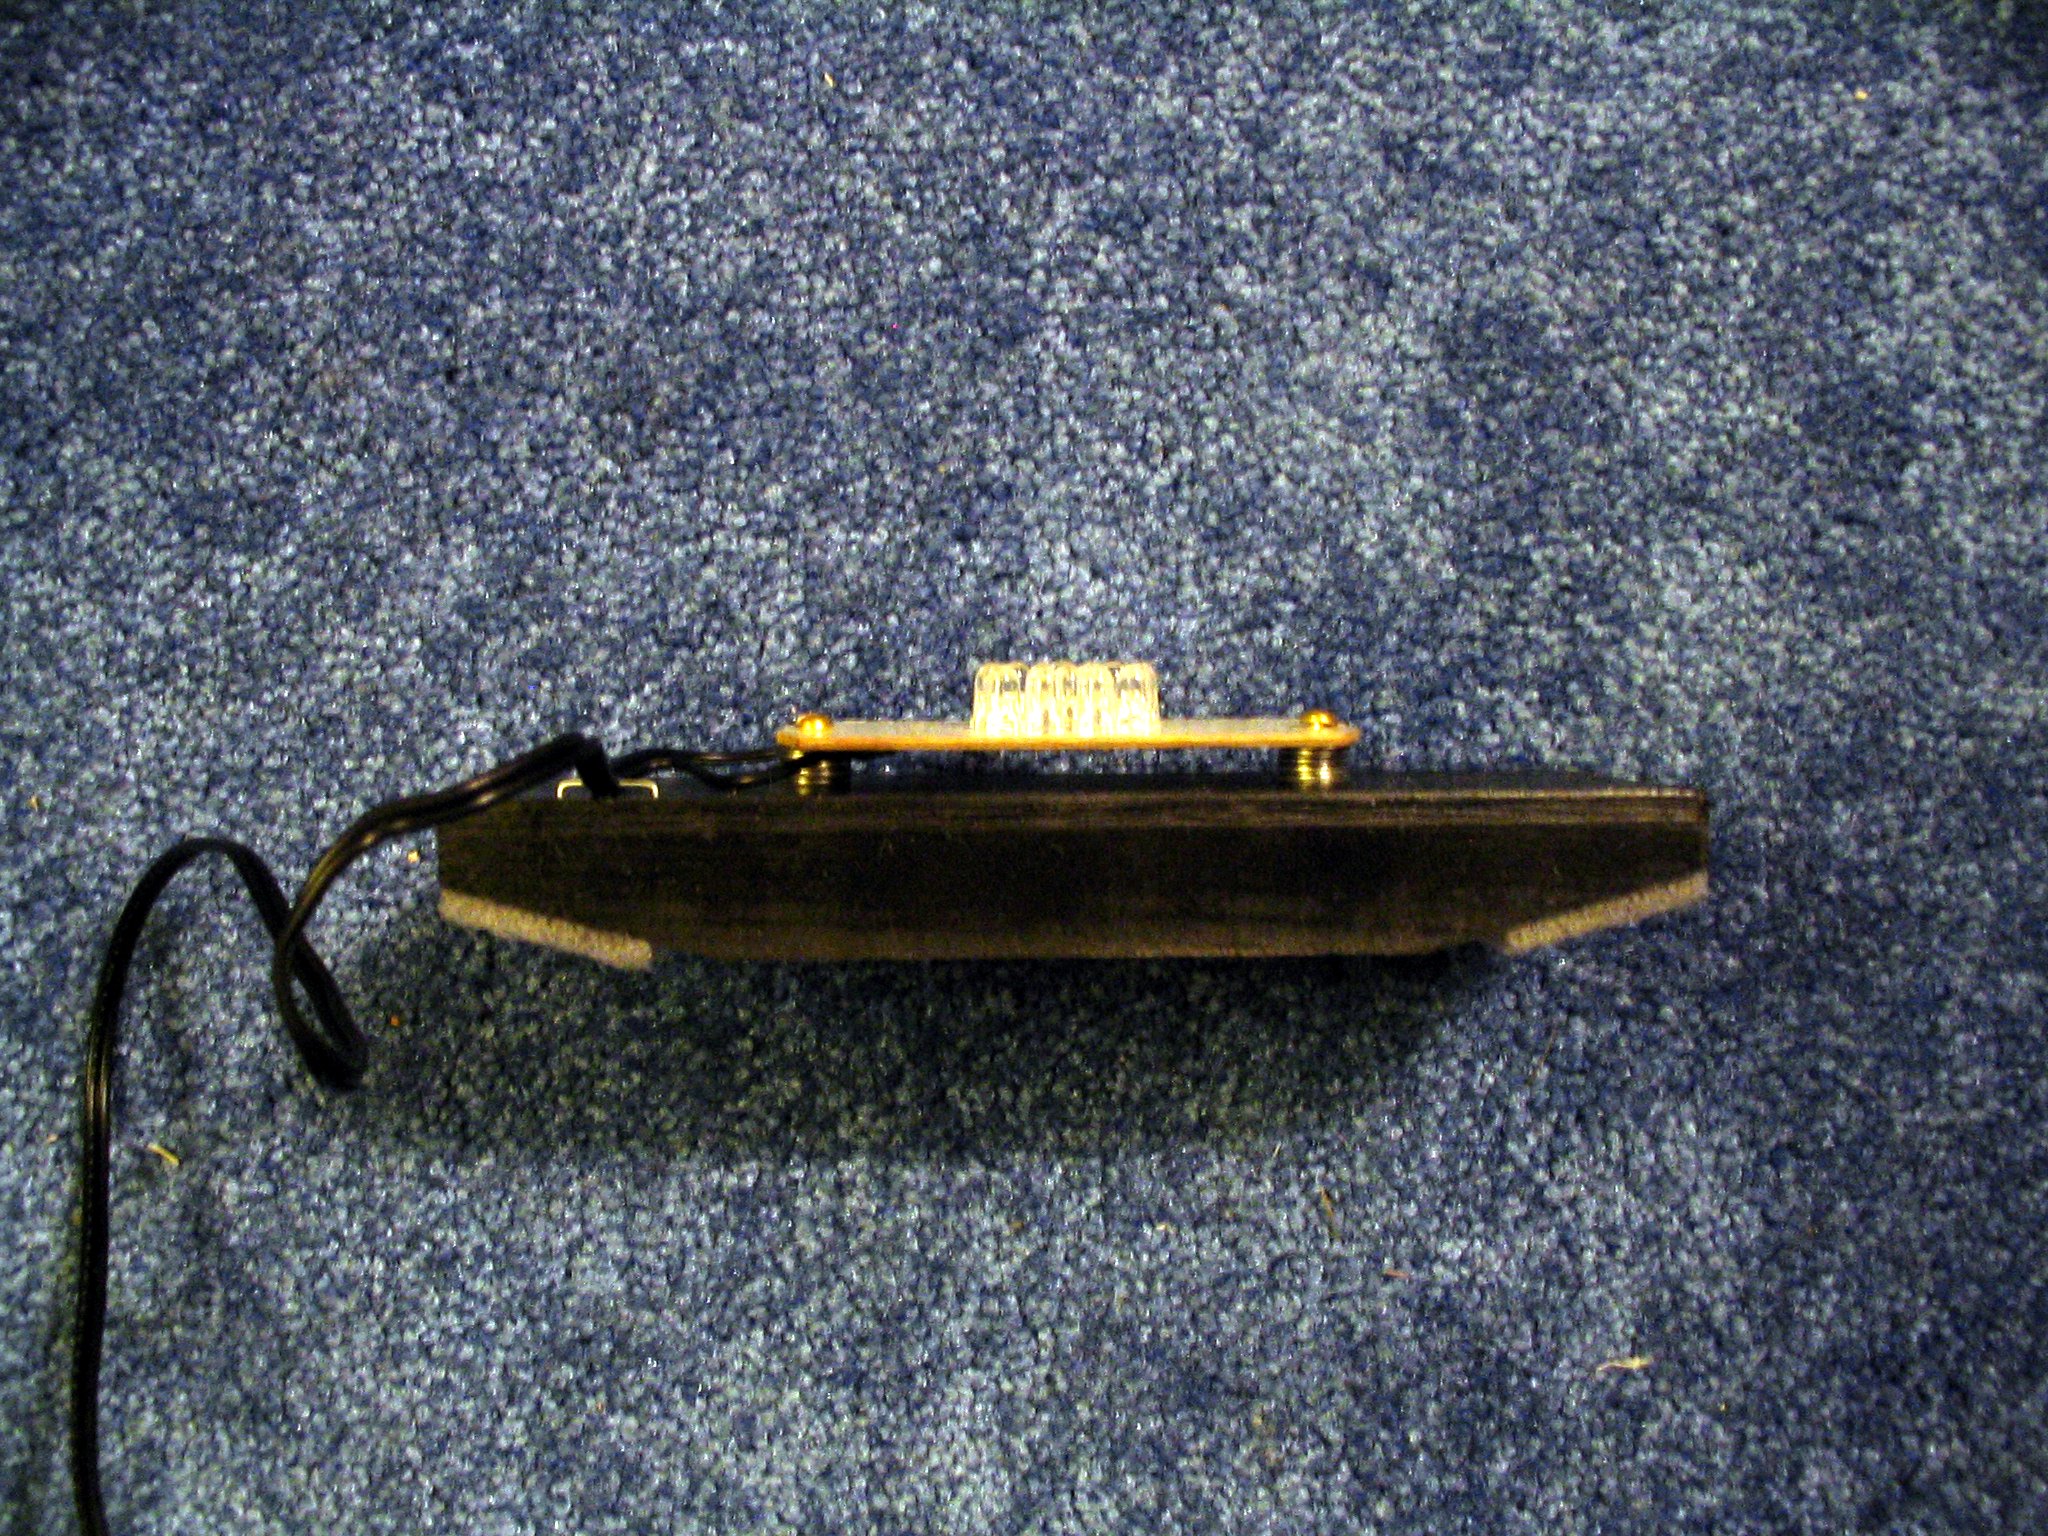
A panel with the 12 LEDs was easily detached from the light housing by removing two screws. The wire to the panel was knotted at the opening where it entered the housing in order to prevent the wire from being pulled out. The other end of the wire had a plug which attaches to the solar panel. The panel uses 3 1500mAh AA batteries to power the 12 LEDs. For comparison, the LZ415 uses 3 800mAh AA batteries for its 3 LEDs. Therefore, it can be expected that battery life is expected to be shorter with this approach than building a system that used 12 LEDs from 4 LZ415s with their associated 12 800 mAh batteries. I did not do any comparison so I don’t know exact details on battery life and or brightness differences. The wire that runs from the solar panel to the LED panel was cut at approximately half way.
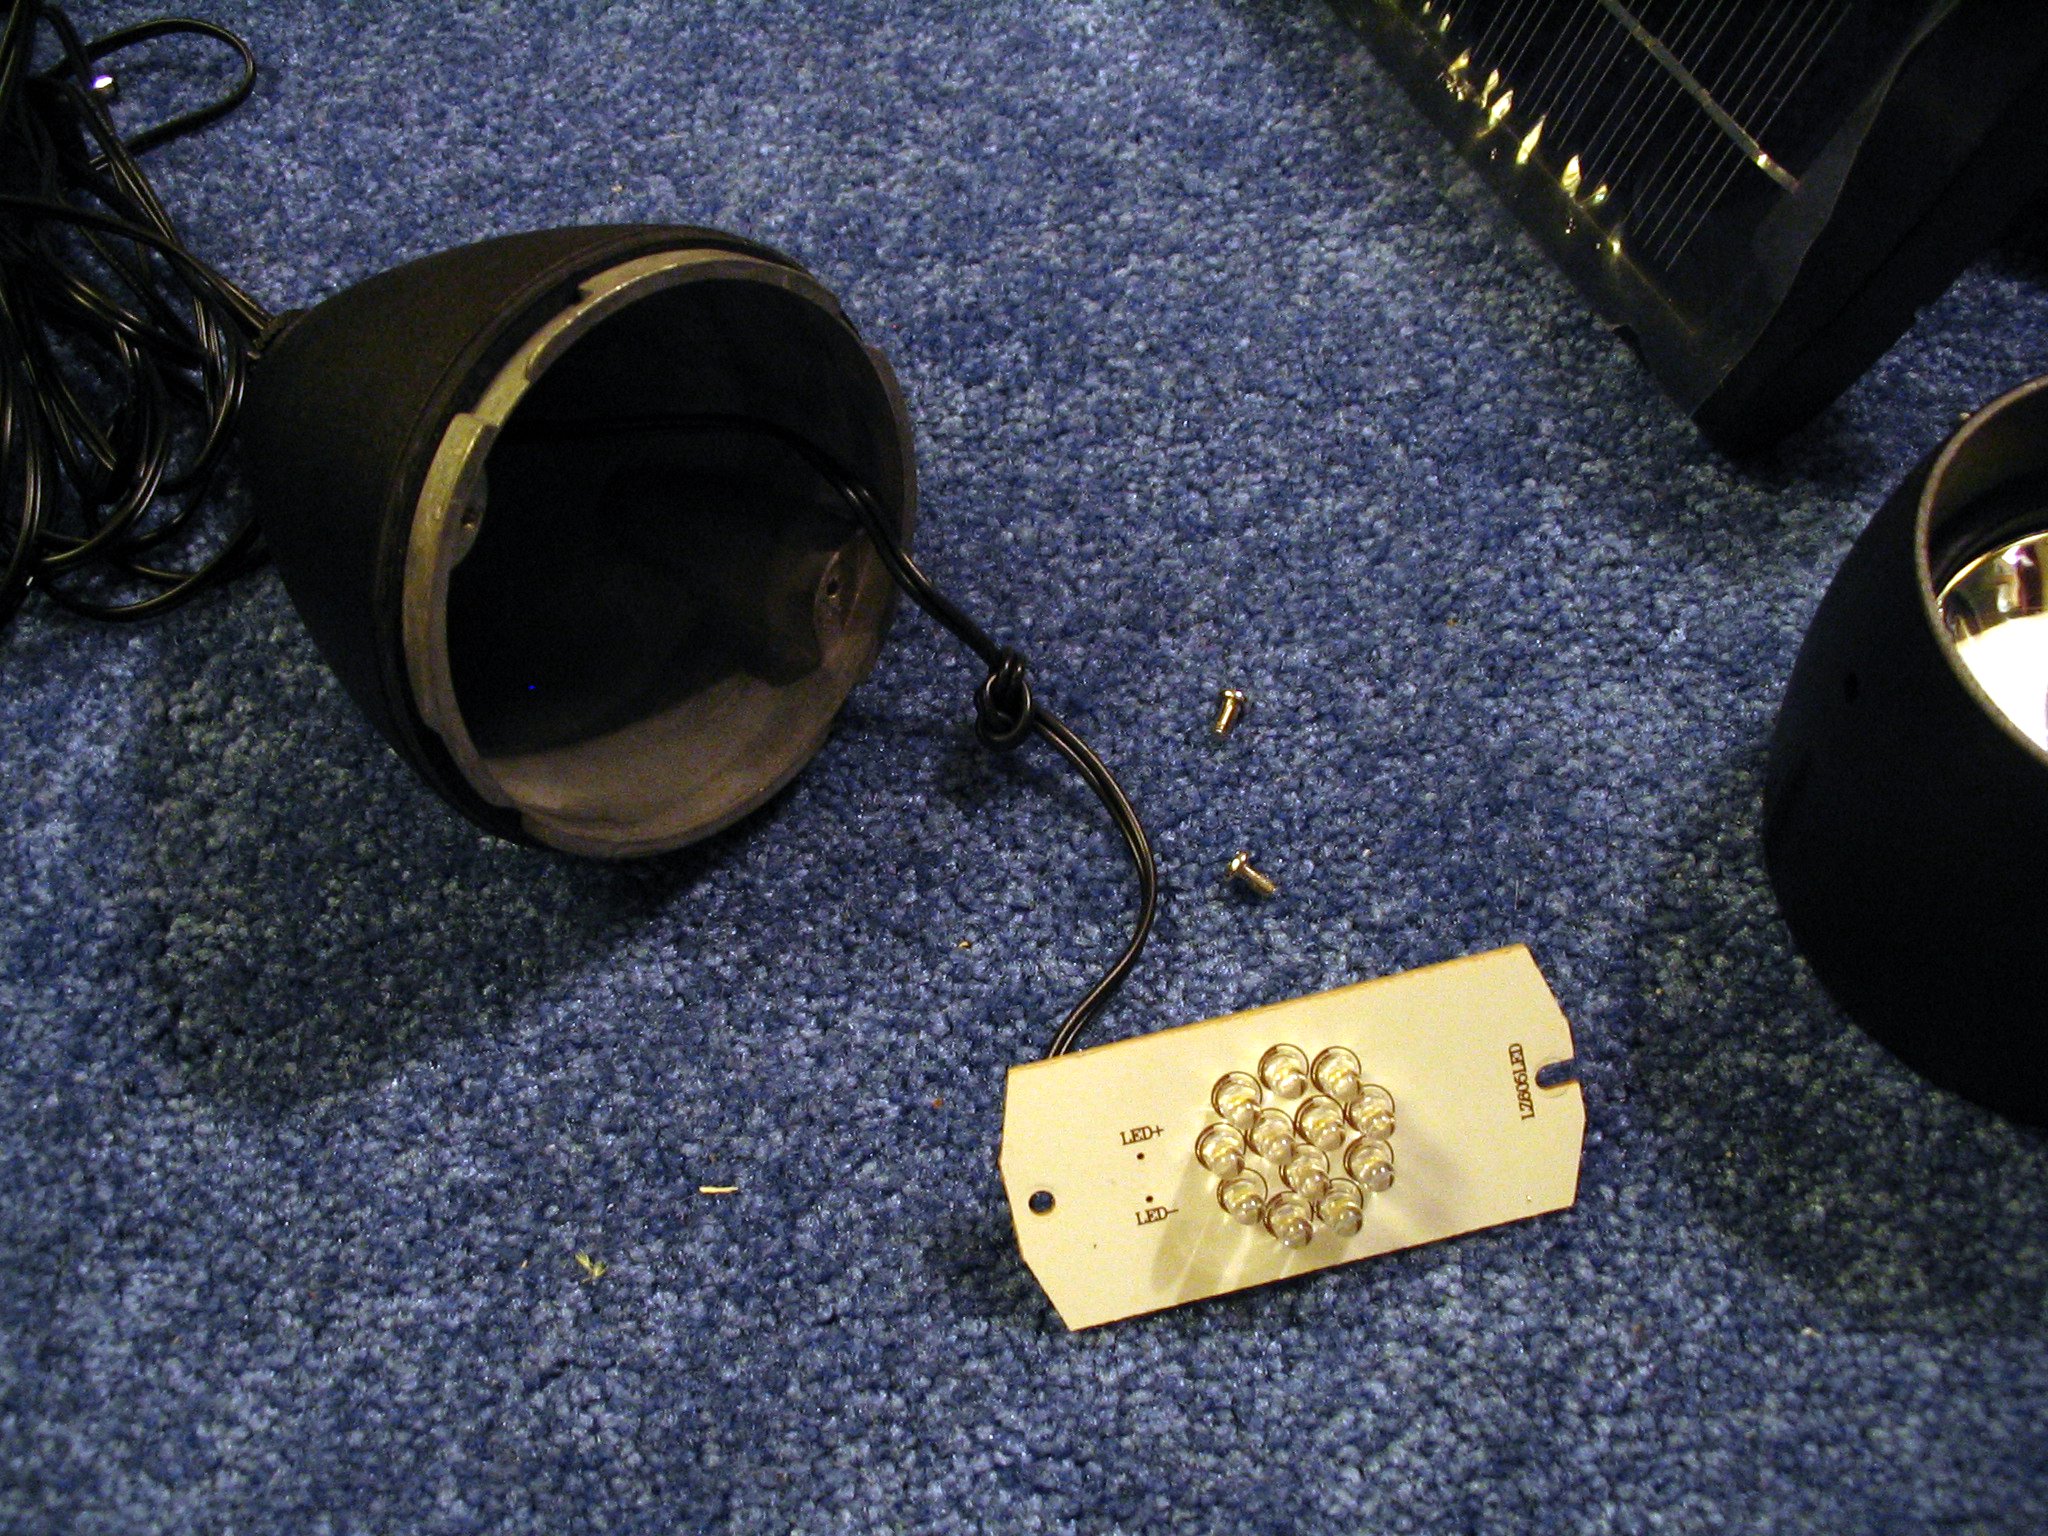
Once removed, the LED panel was attached to a block of wood with screws. Five washers were used under the panel for each screw to keep the panel and its associated wiring off of the wood block. The other side of the block has each corner tapered to match the angle of the underside of the top of the light. The top of the slight slopes 15 degrees from horizontal. The tapers on the block match that angle. Heavy duty Velcro was choosen to mount the block to the top of the light housing in order to avoid making any holes in the top of the light which might leak and allow water into the fixture. About an inch from the LED panel the wire was stapled to the block in order to provide strain relief on the points where the wires are soldered to the panel. The block of wood was painted black so that once in the fixture it would not be obvious that it was there.
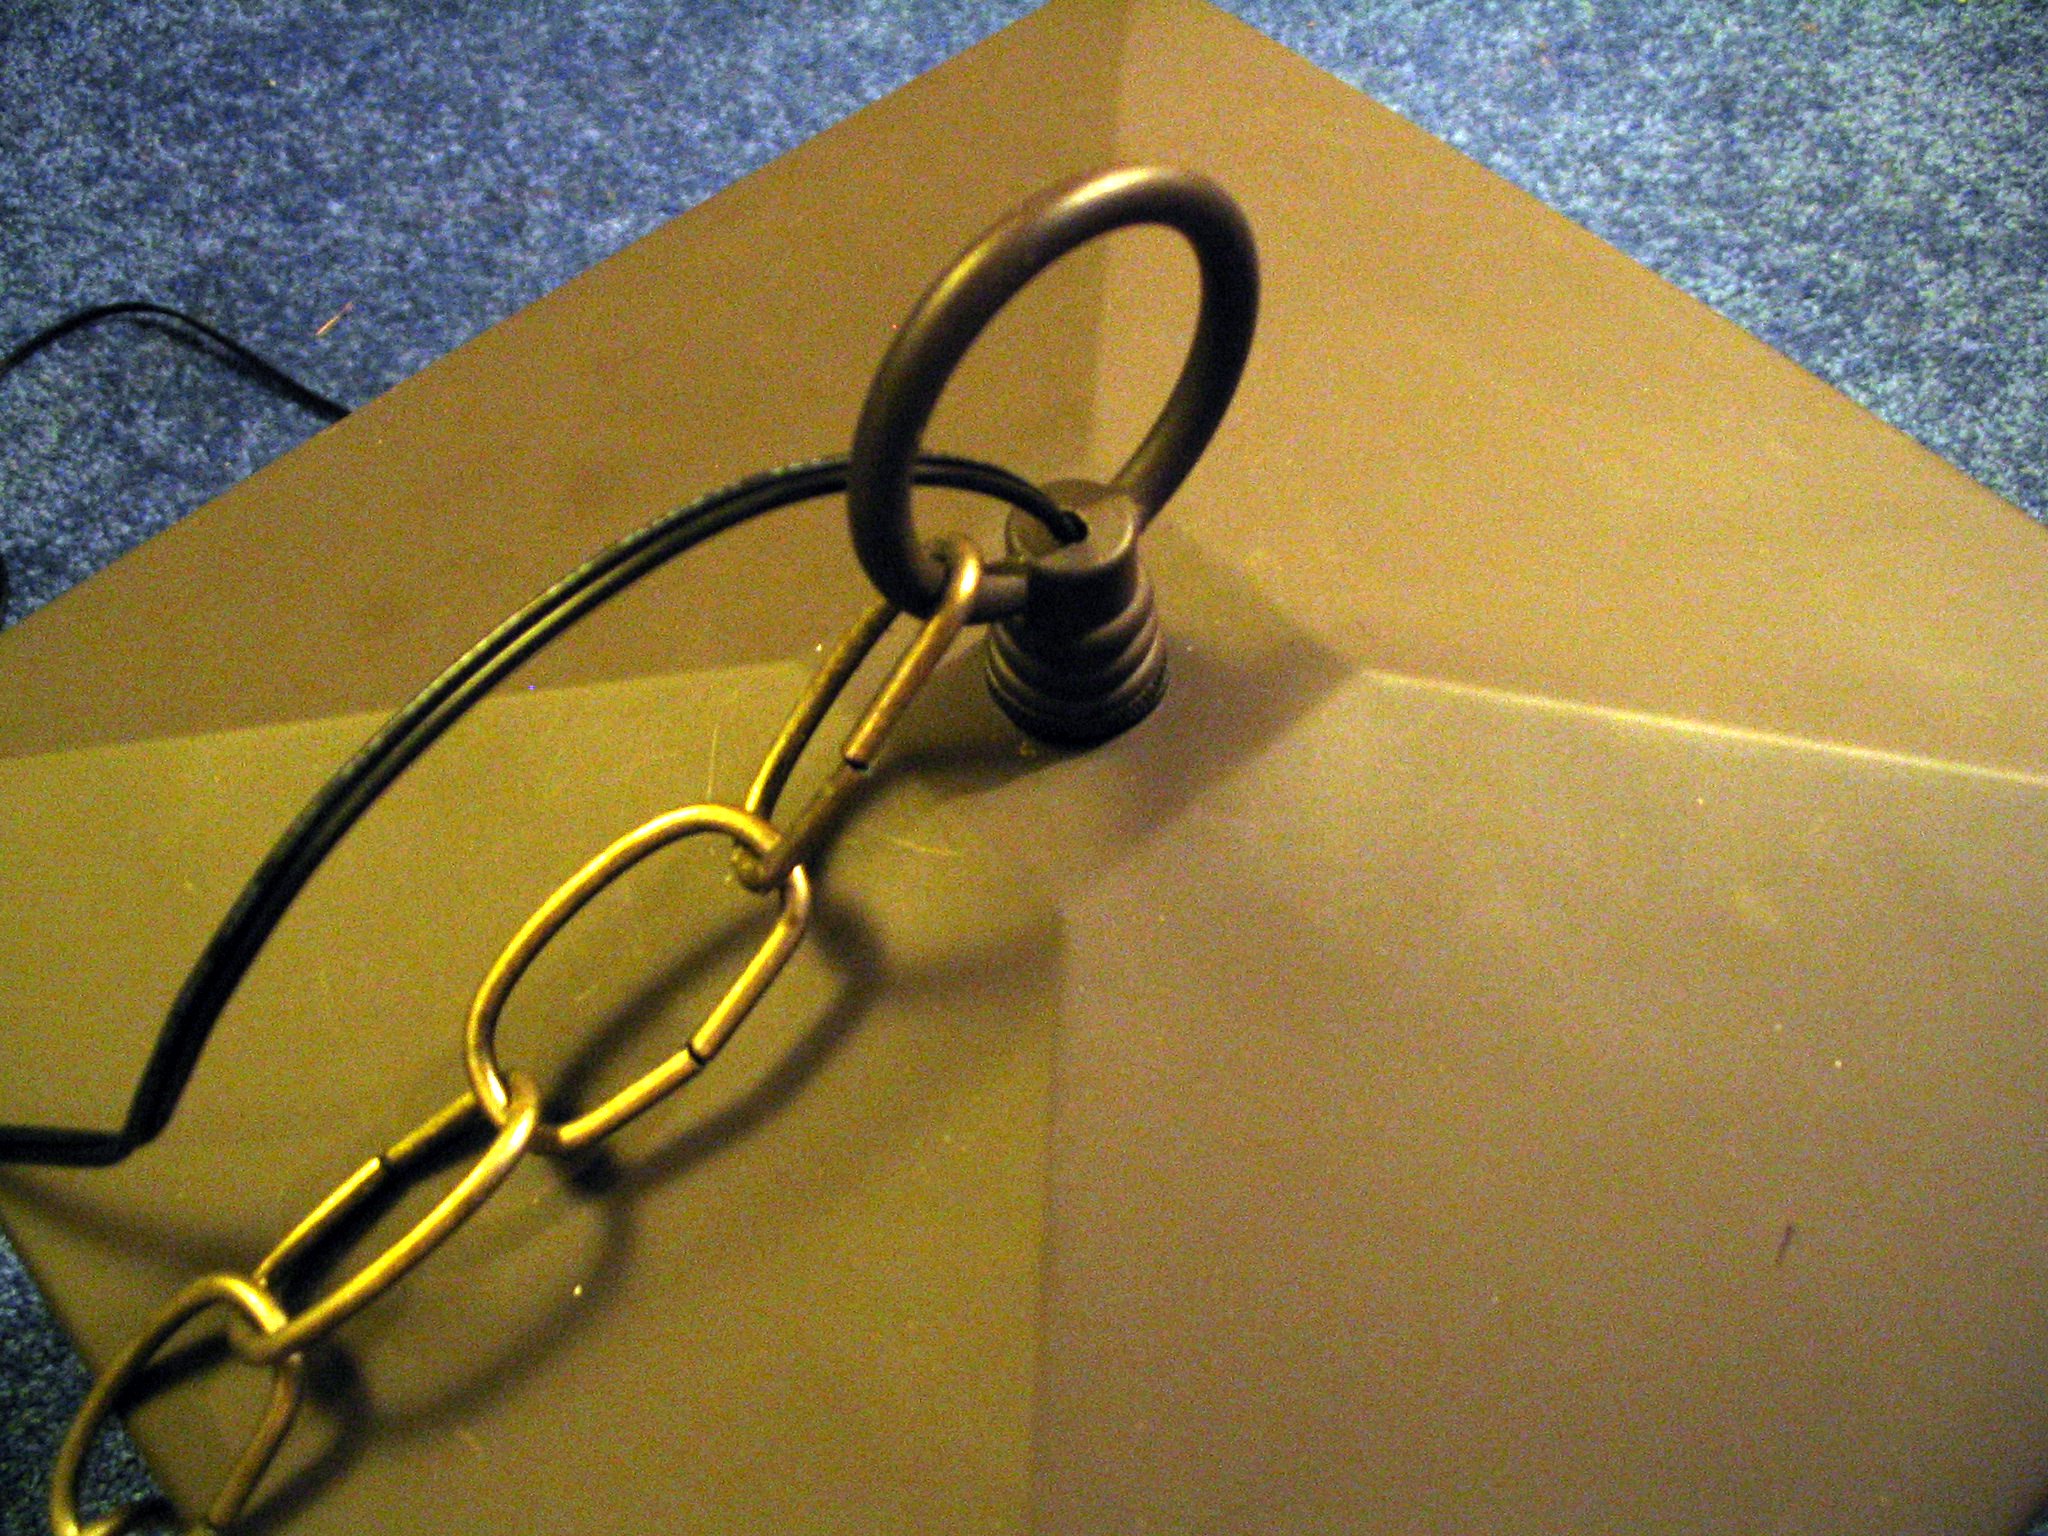
The wire from the solar panel was routed through a hole drilled into the top of the light. The hole was necessary becuase all wiring came from the bottom of the fixture meaning there were no entry points at the top of the light. The circular loop on the top of the light provided a nice place for the hole. The hole was drilled in the center “nipple.” A 1/16″ bit was used to start the hole followed by a 1/8″ bit to finish it. Since the hole had to be drilled from an angle from both sides of the loop, the hole was slightly oblong. The was perfect since the wire was actually two wires side by side. A chain was added to the loop for the purpose of hanging.
Once the length of wire that runs from the light to the solar panel was confirmed (by acually hanging the light in place) the wire was cut to length. A knot was made in the wire and fed up into the nipple on top of the light housing. Clear silicone caulk was then applied to both sides of where the wire traverses through the fixture. The wire was then attached to the wire from the LED panel which had also been shortened.
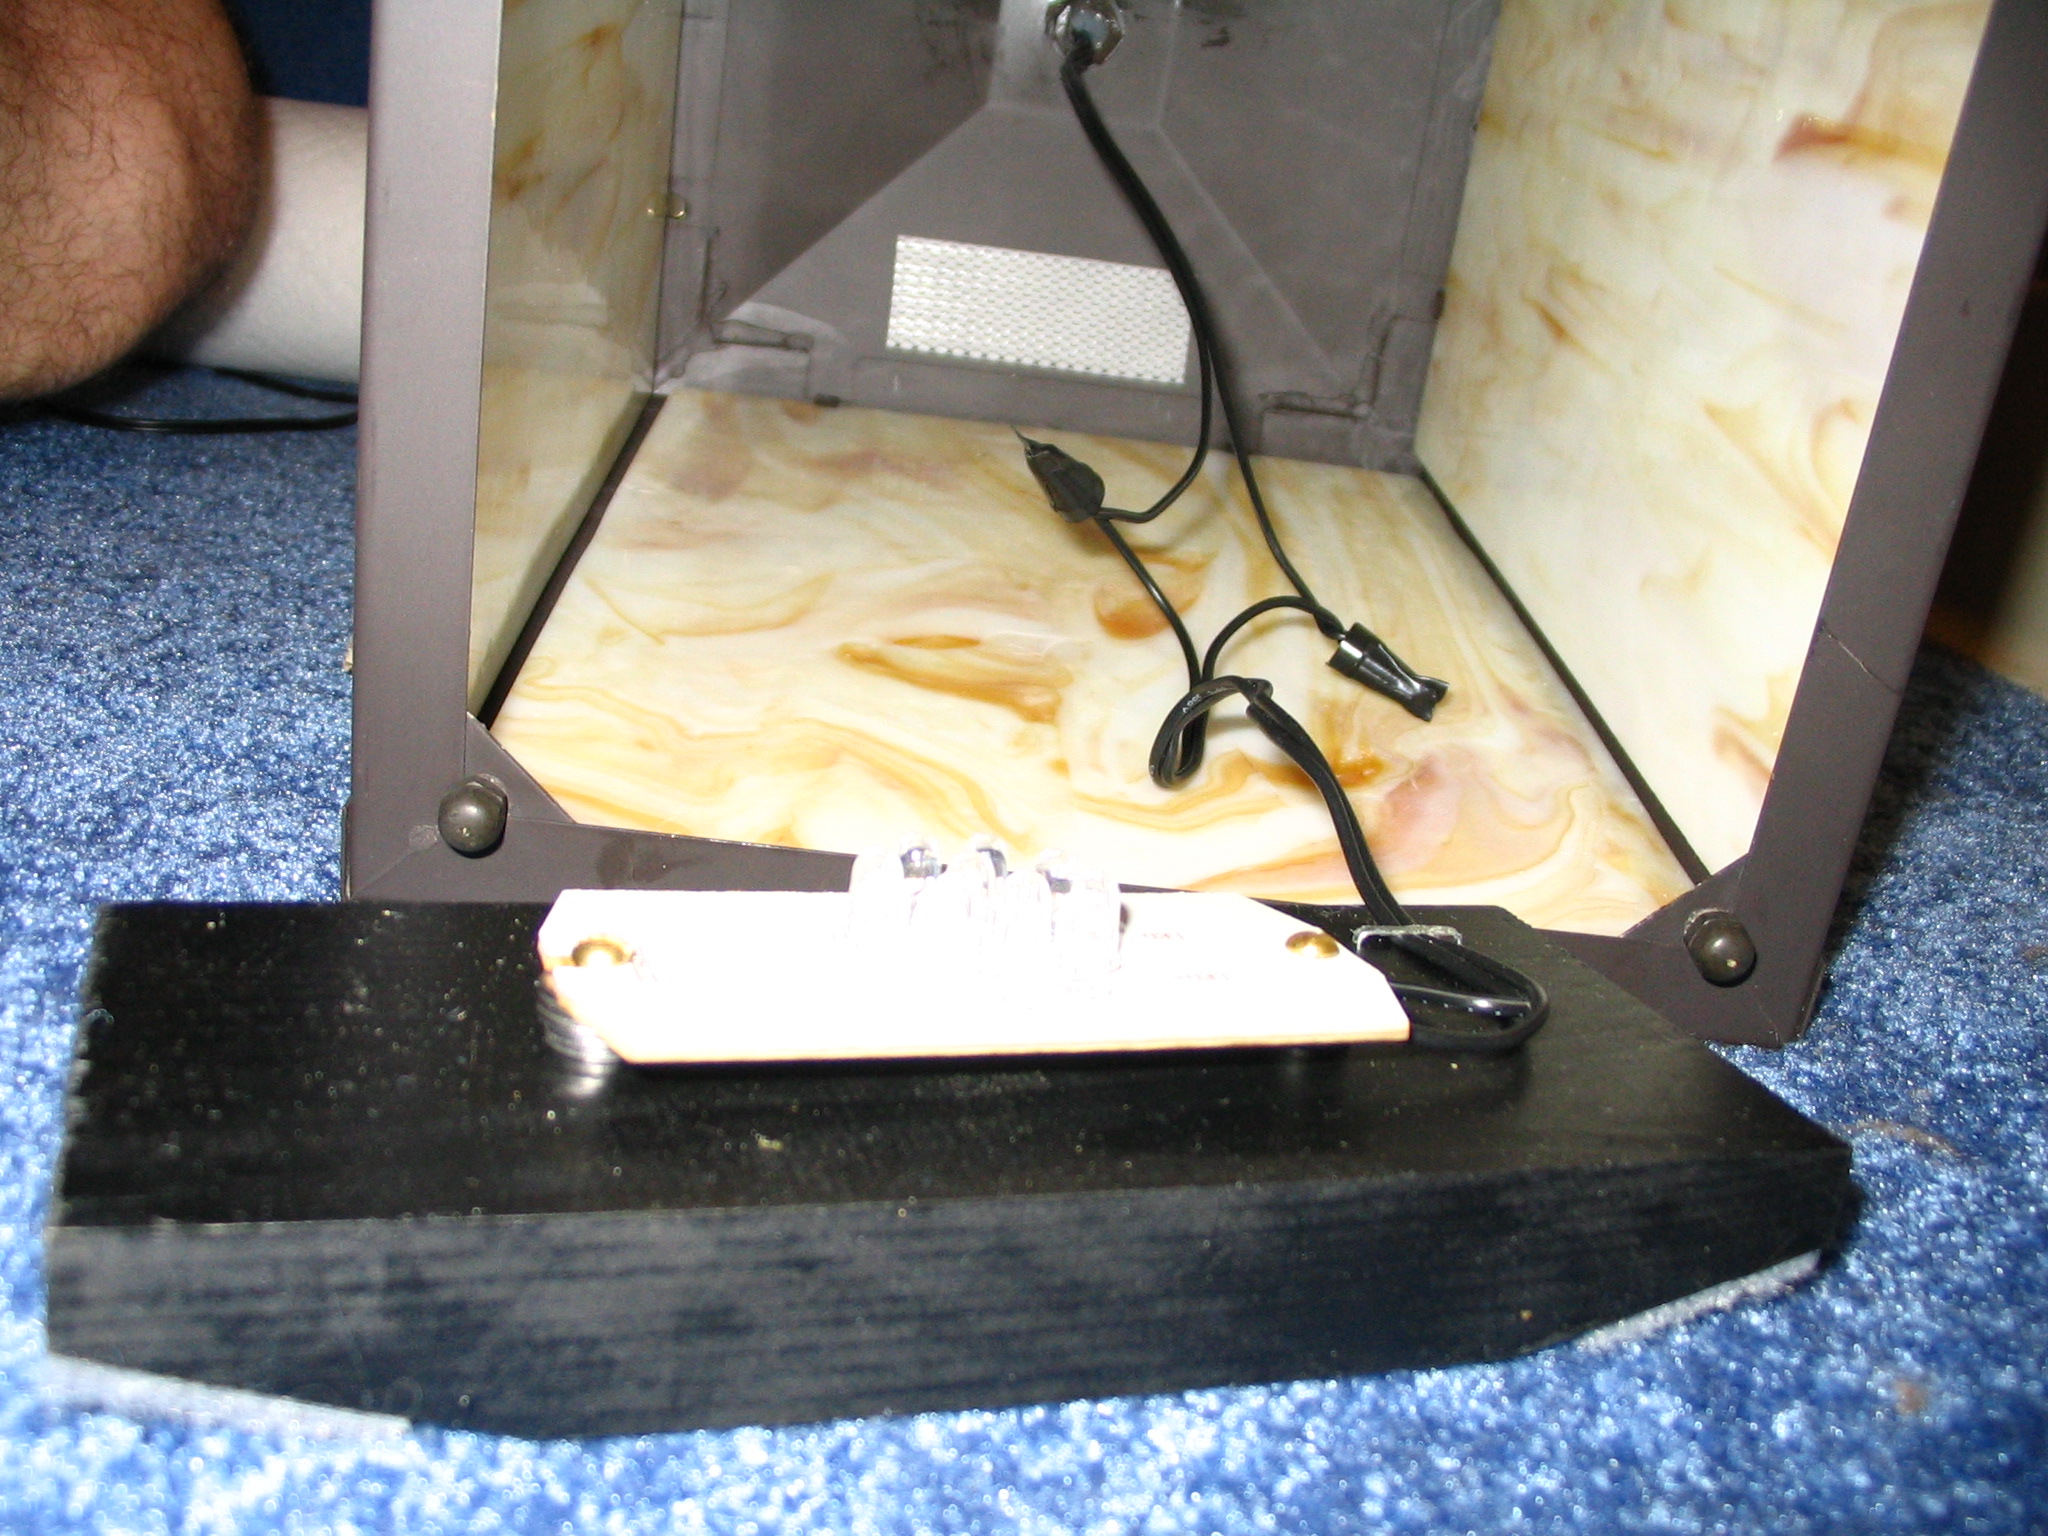
The other side of the Velcro was attached to the underside of the top of the light housing in a way that would line up with the Velcro on the LED block. The gray wire nuts used to connect the wires were wrapped in black electrical tape in order to “hide” them from the view of those who look up inside the fixture. Painting them would have been better but, due to time constraints, this adequately served the same purpose.
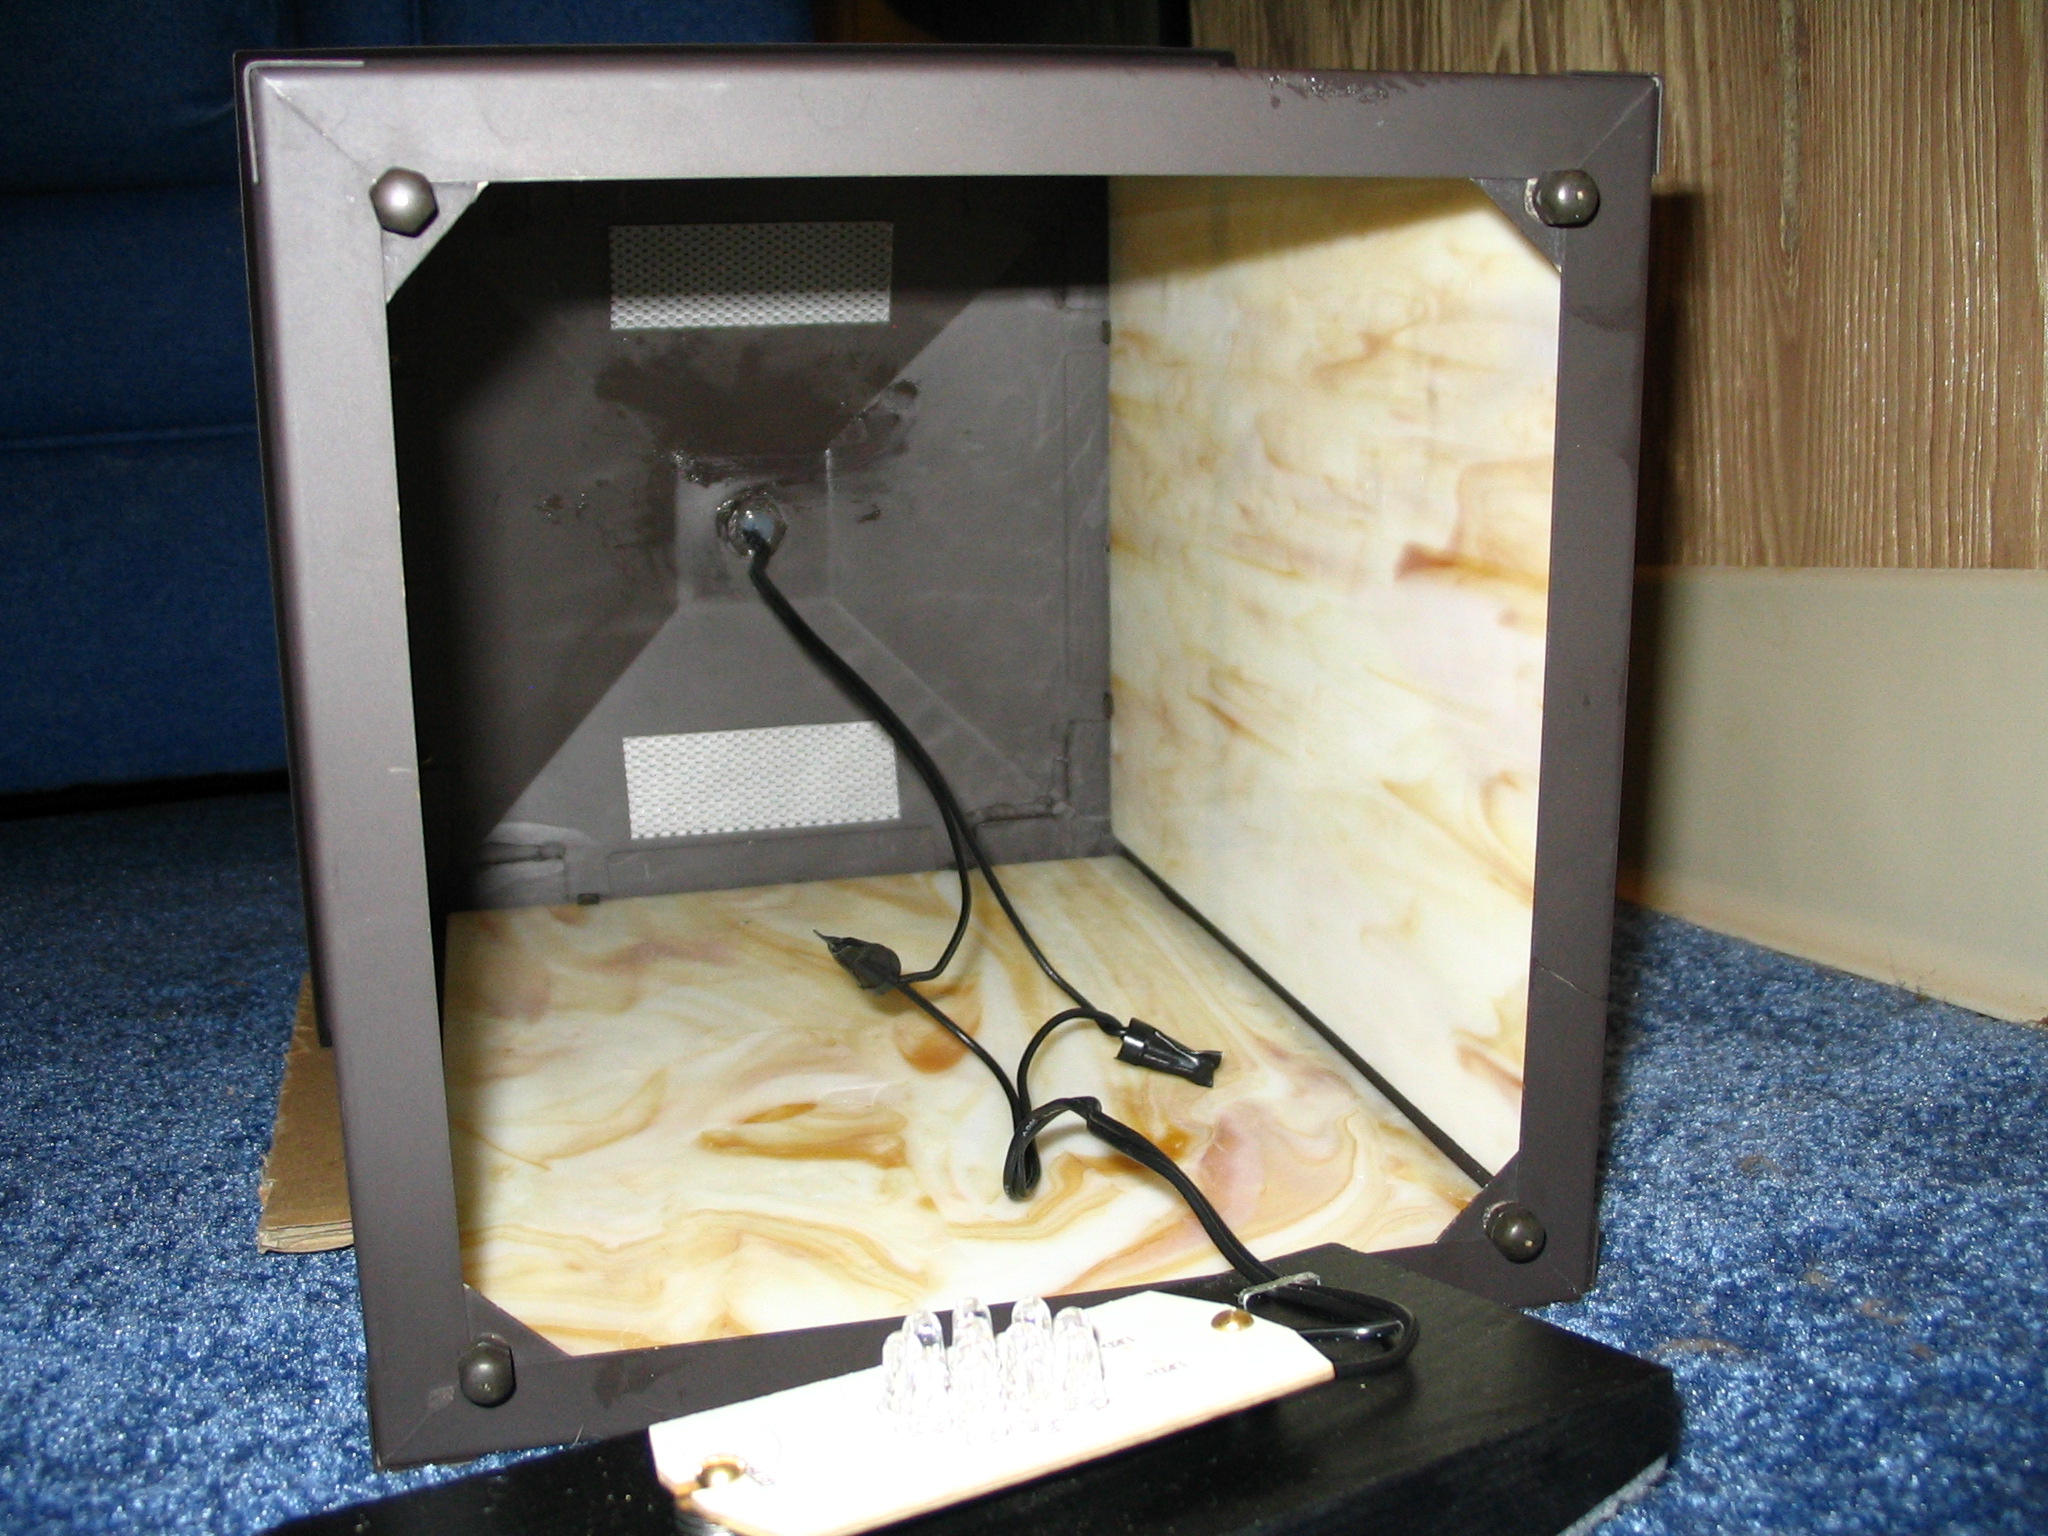
The LED block was then pushed up inside the fixture where the Velcro held it in place. The excess wiring is held behind the block of wood. The black coloring of components now shows it benefits.

When the fixture is on the components on the top of the fixture are even less obvious. Eventually, a bottom panel could be added to the fixture for aesthitic purposes. The printed materials that came with the light fixture contained a number to call if one of the glass panels was broken so I am sure they could provide an extra one at some cost.
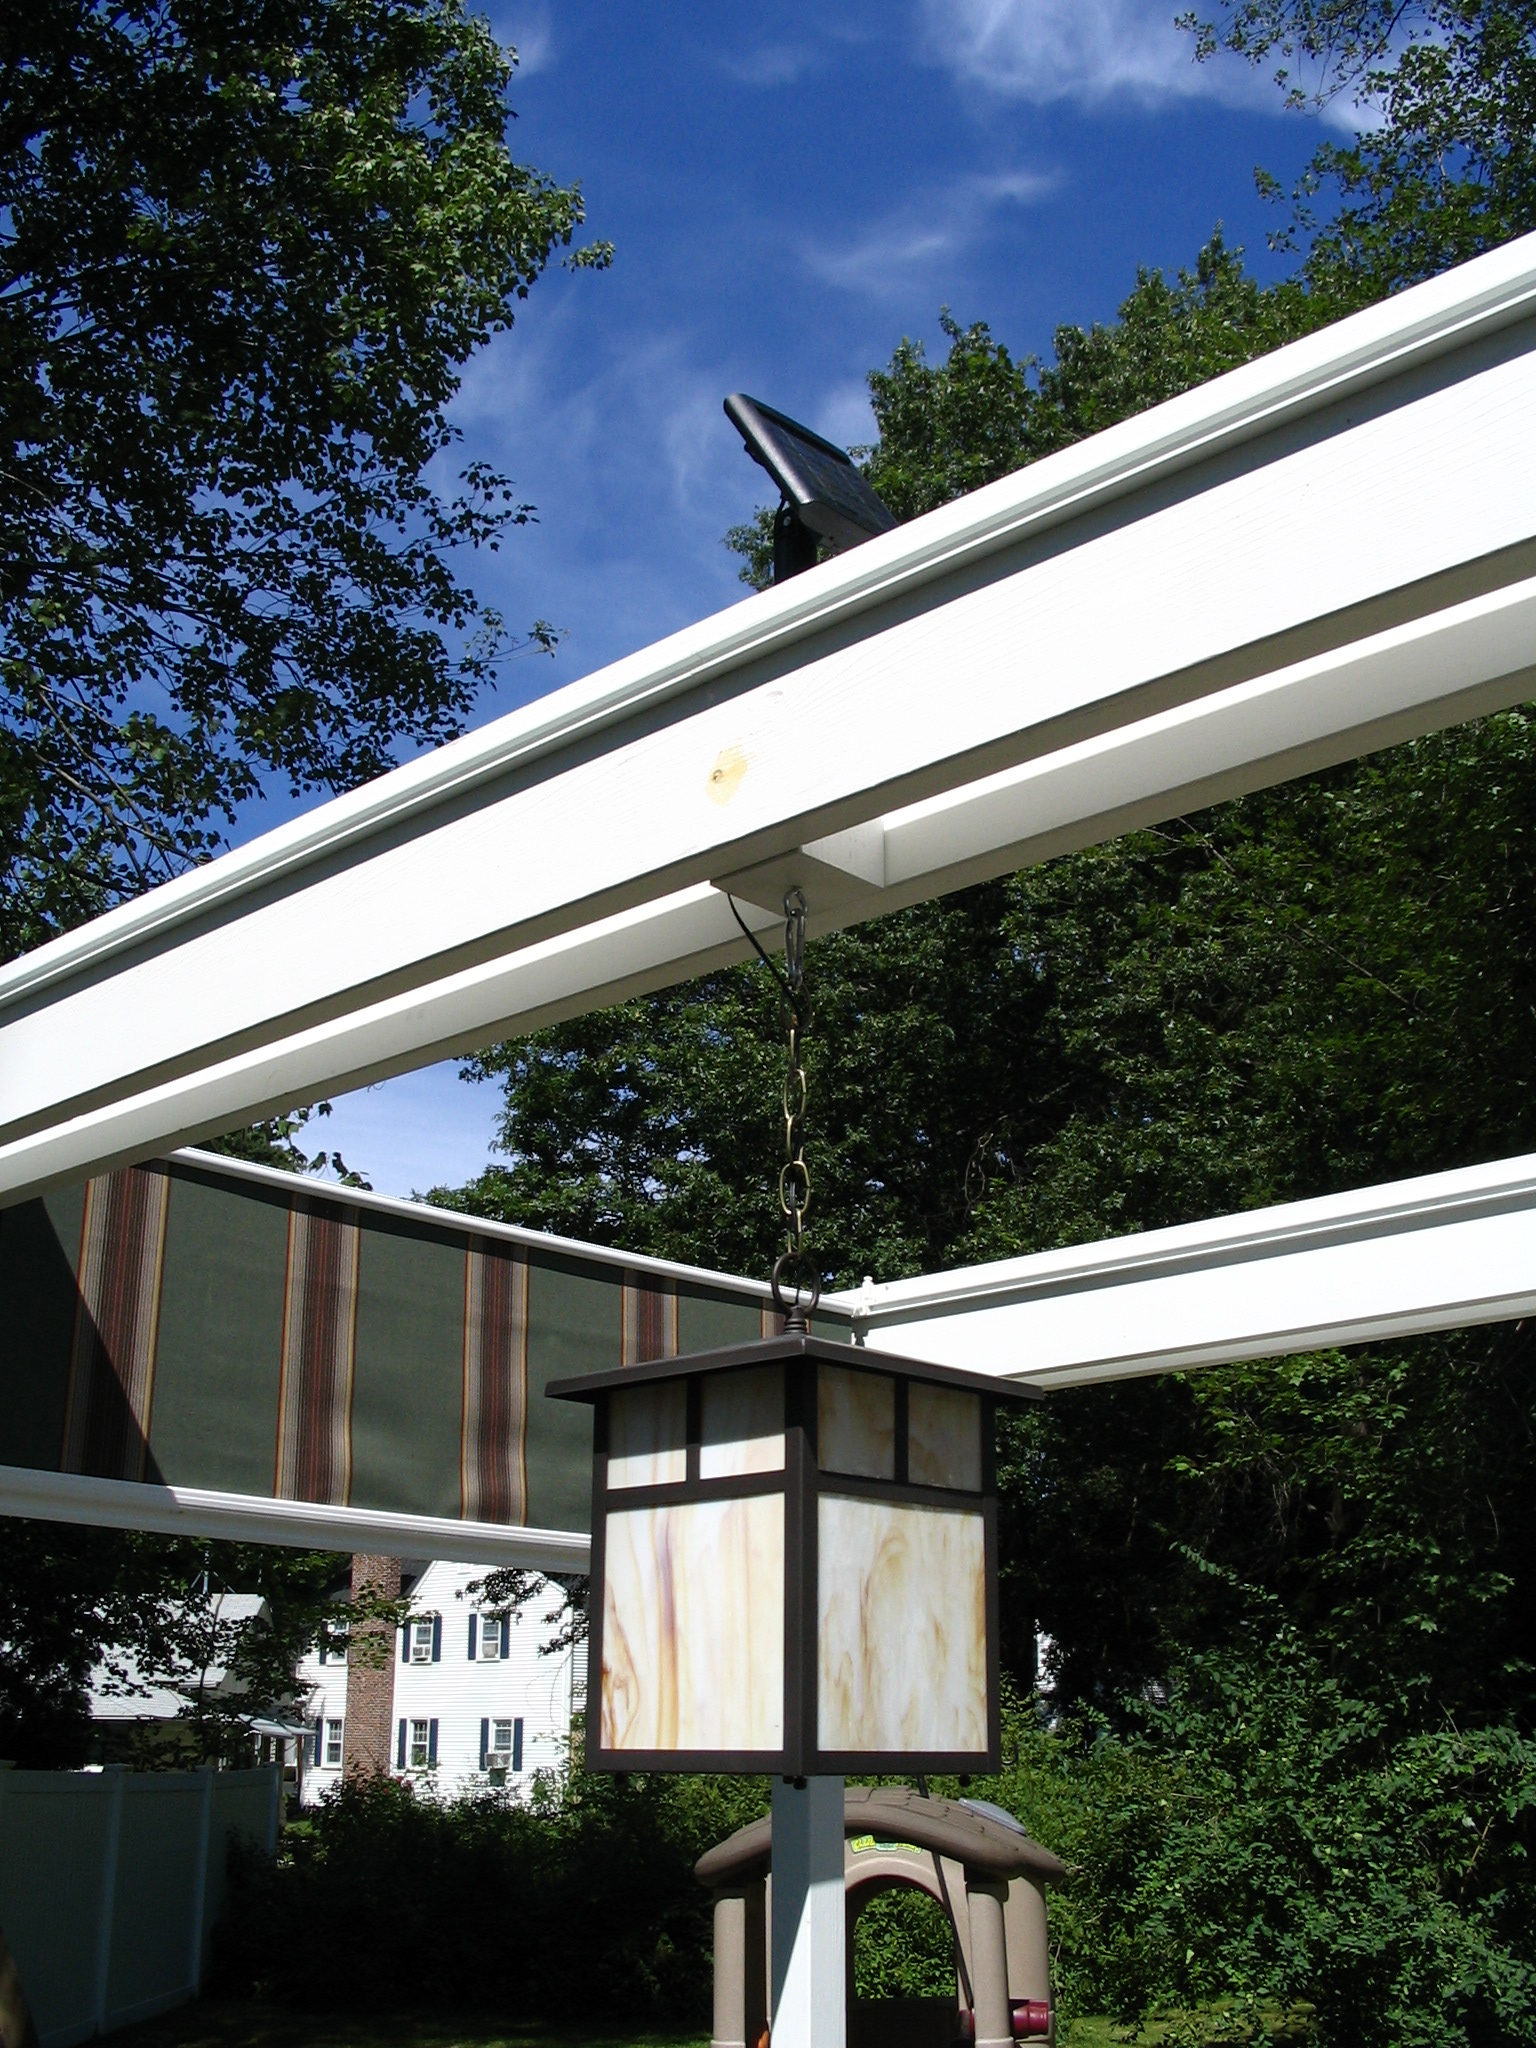
Even in the daylight, the fixture looks nice. The solar panel is in sight but will not be visible once the shades are pulled across the pergola. Even so, it is a conversation piece itself.
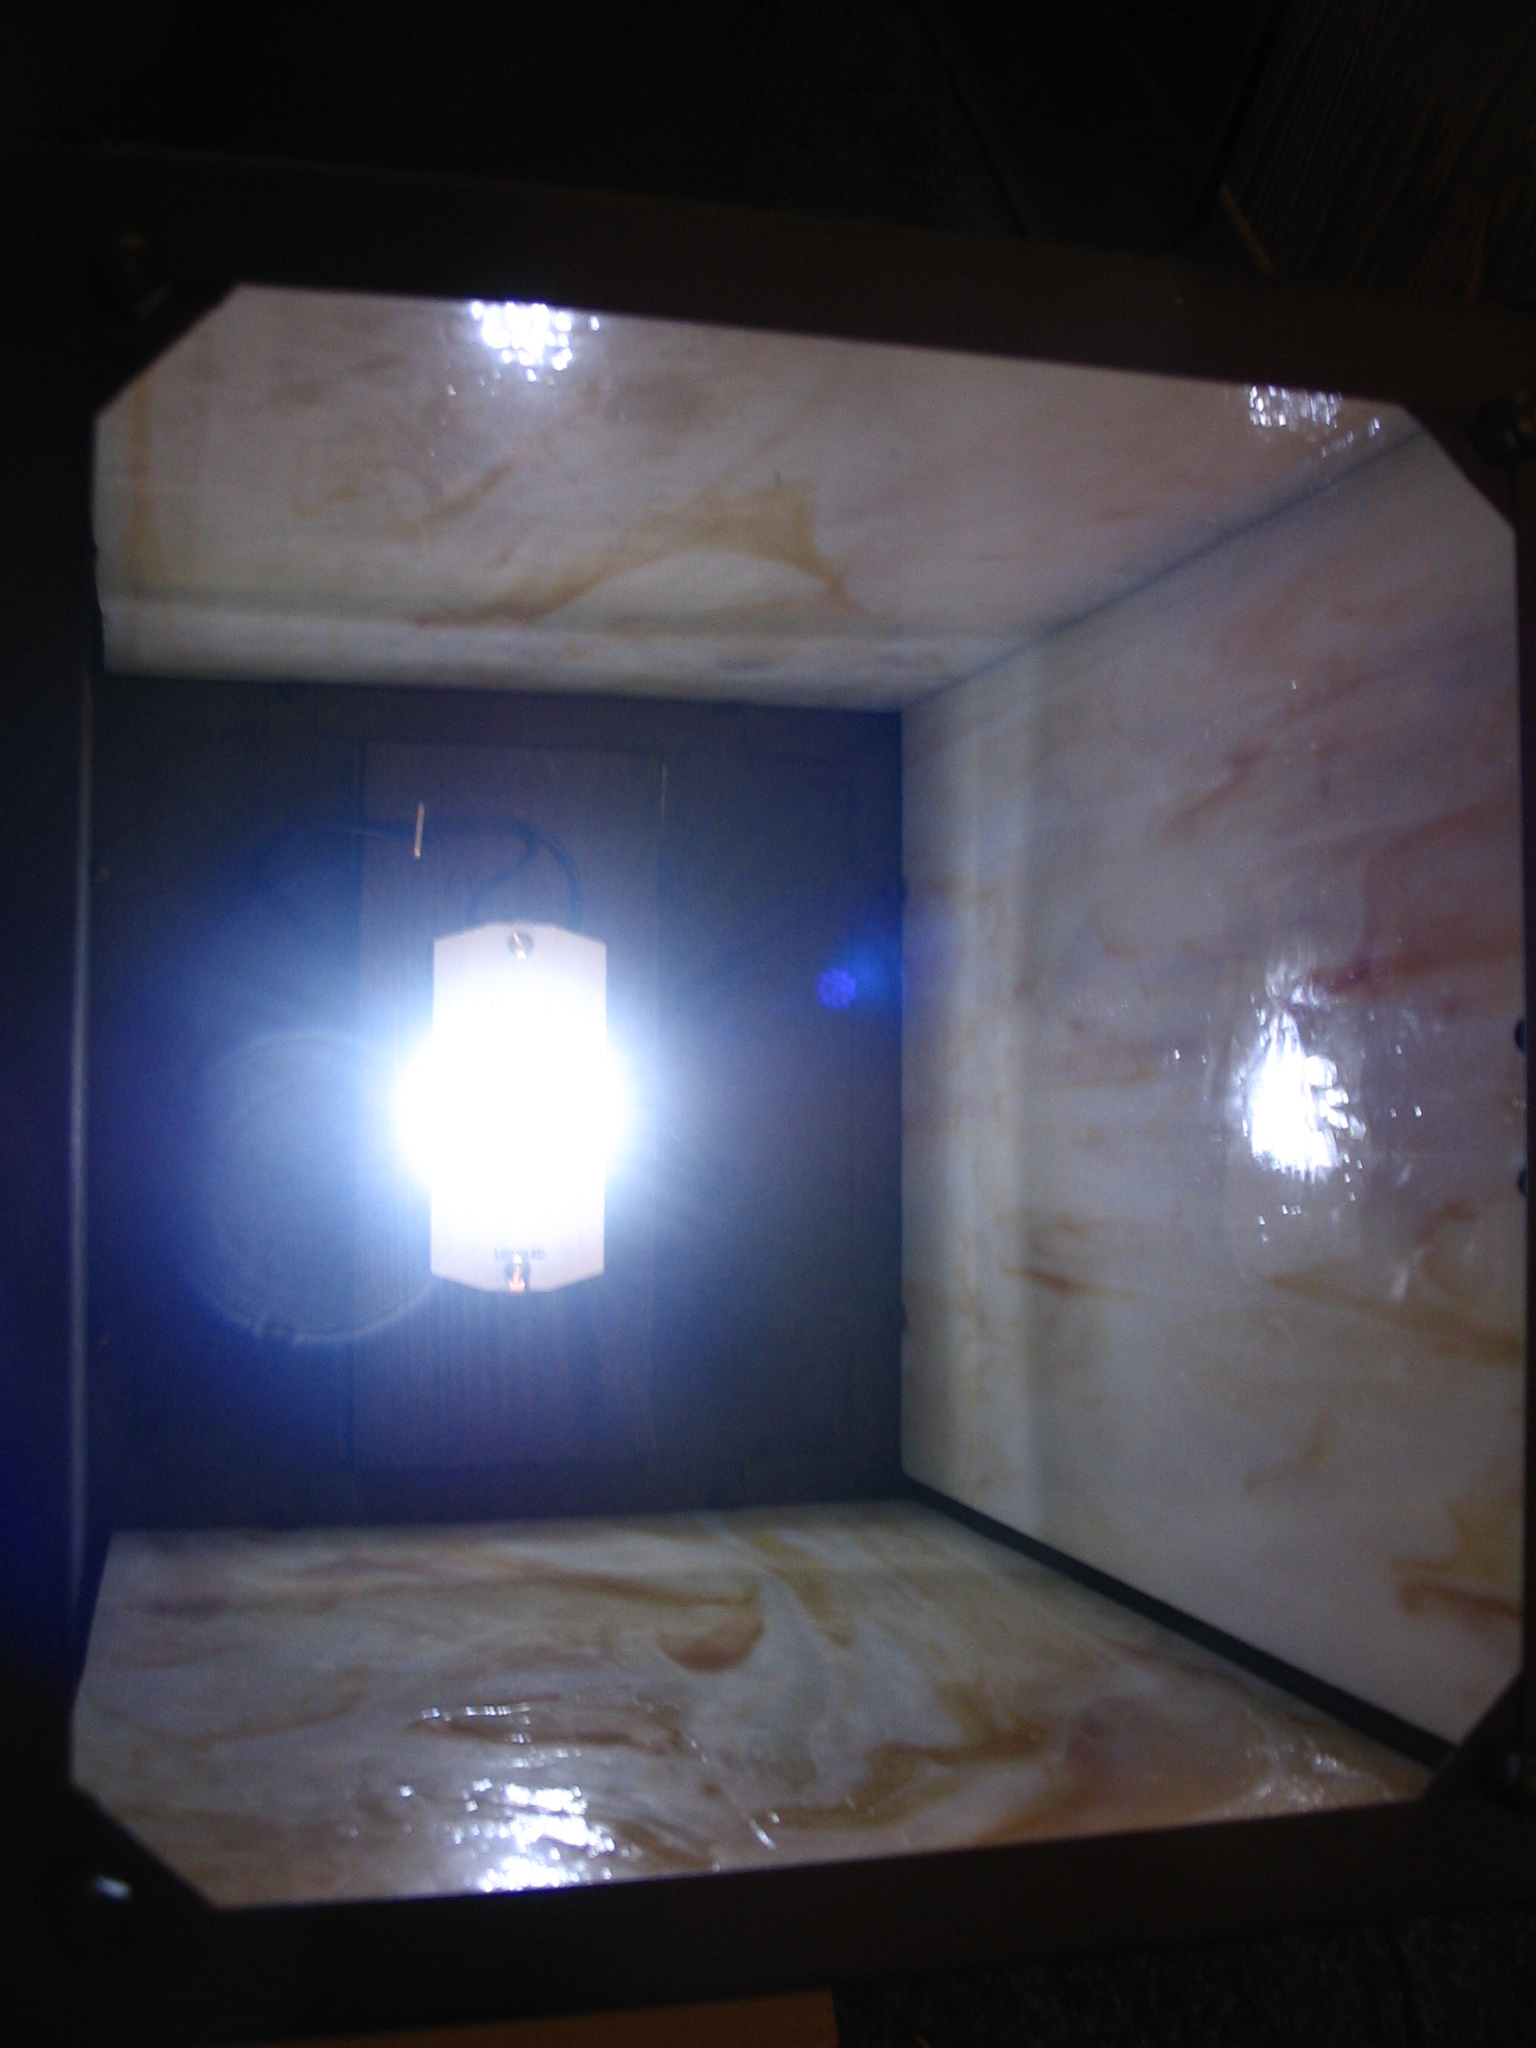
At night, the light is enough to see what is on and around the table. Although, the picture does not do the level of light justice.
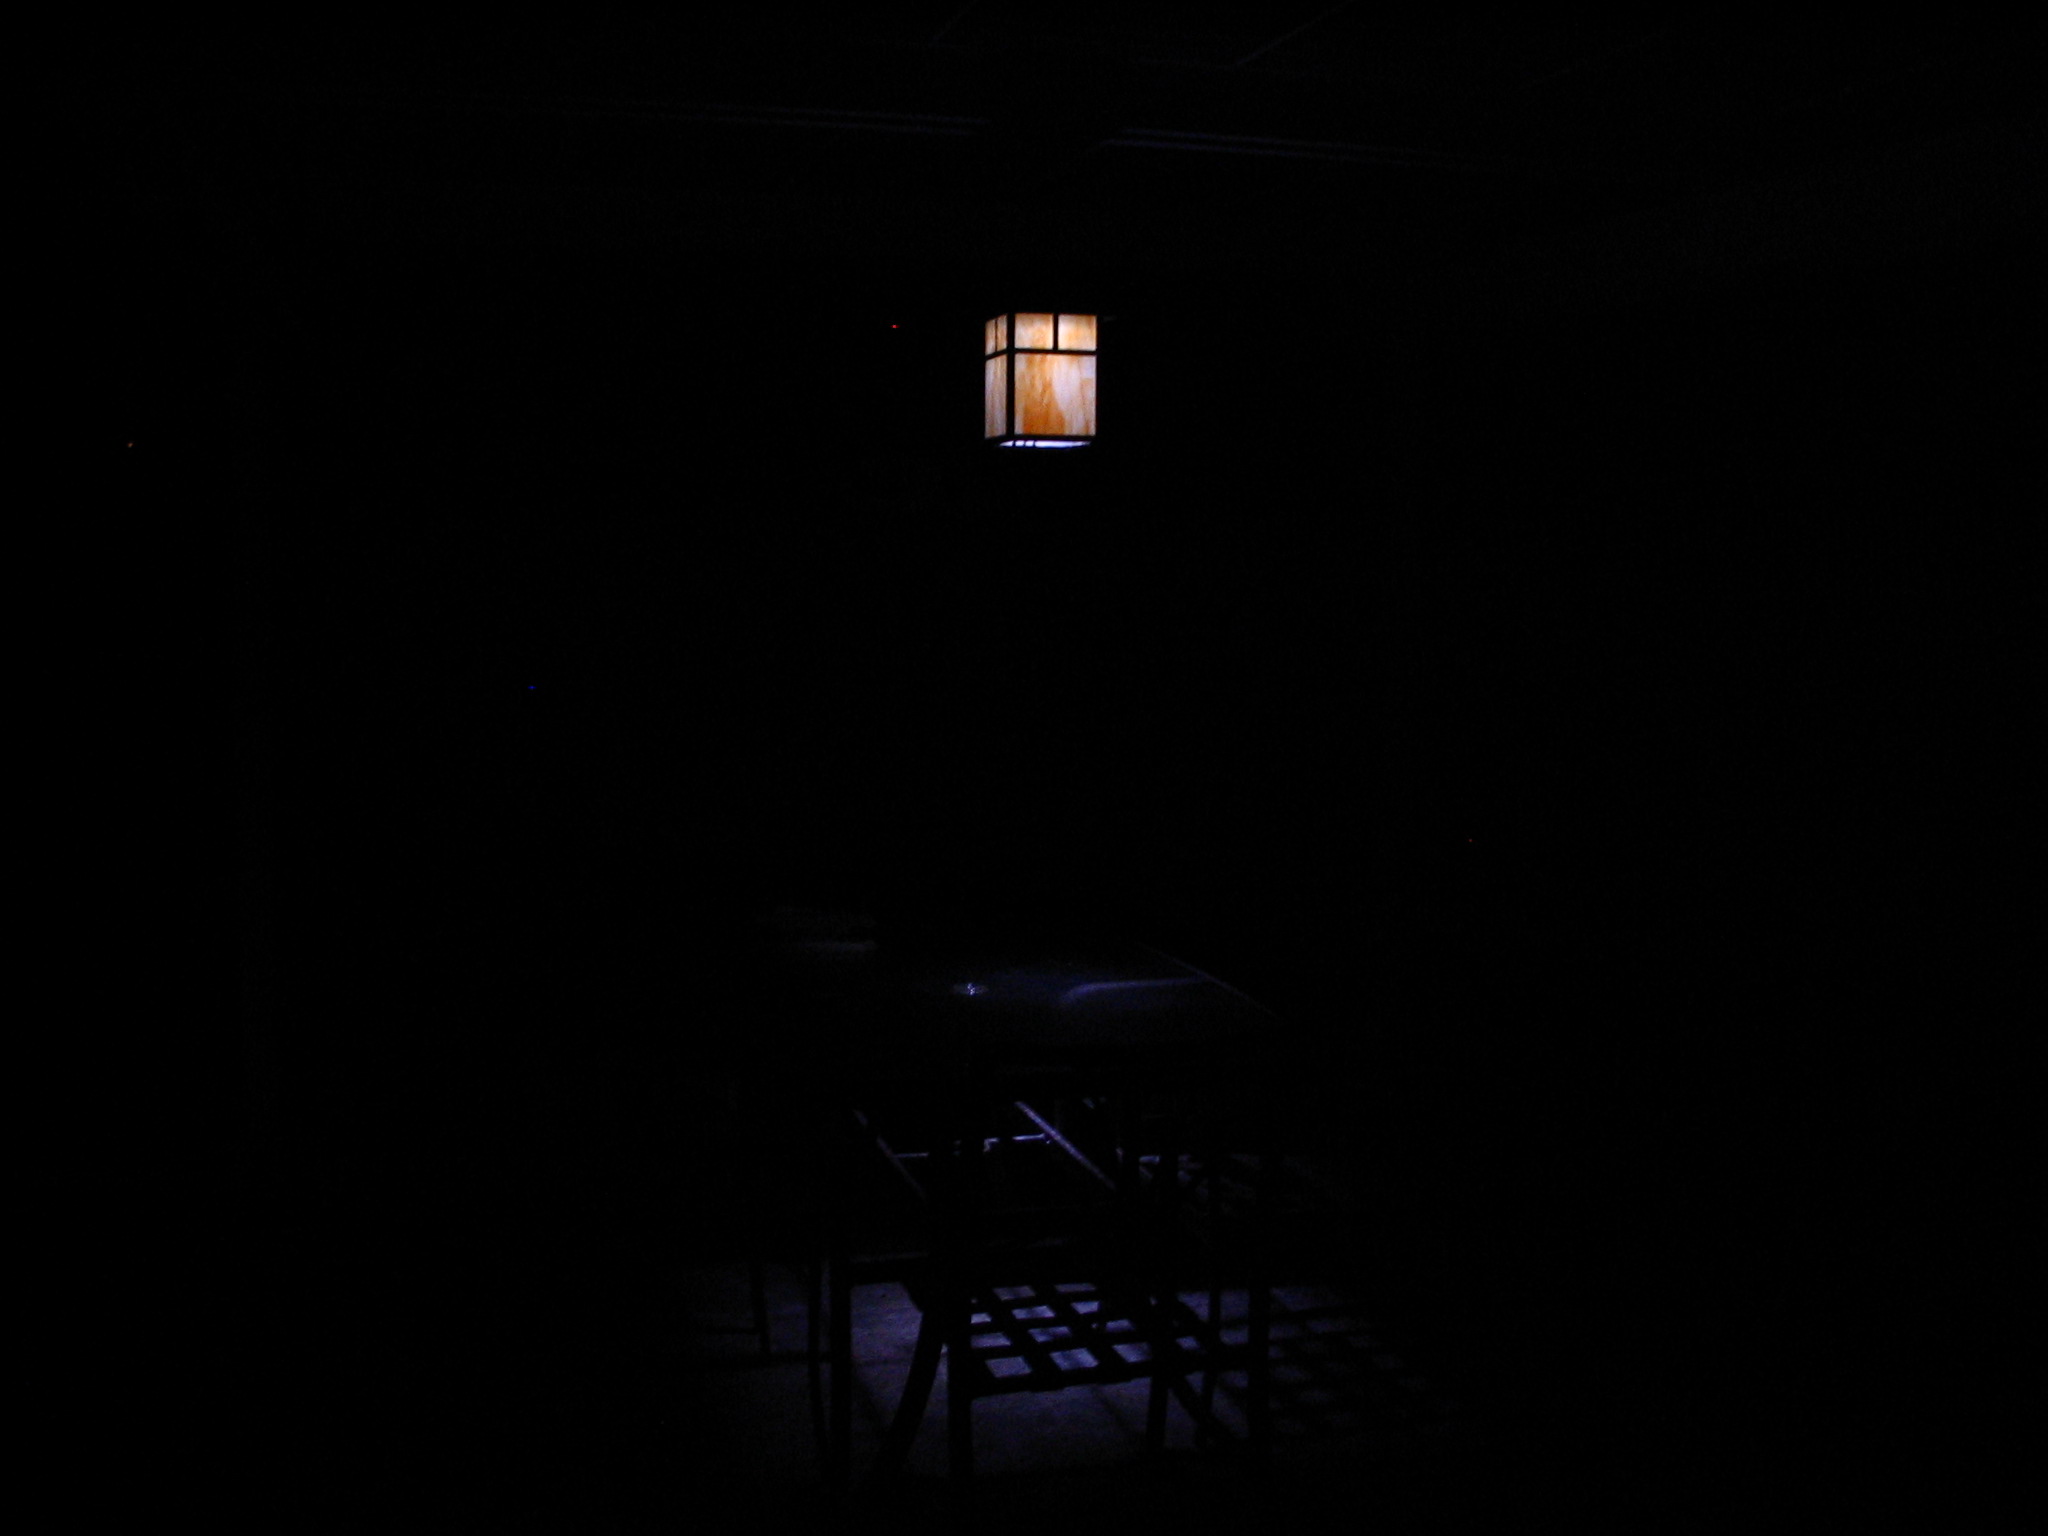
The same picture but enhanced with Picasa’s “I’m feeling lucky” feature gives a better idea.

Update: I have found twice that the LED block has become detached and the block falls out of the fixture. It is not the Velcro that is detaching but the glue of the back of the Velcro fails to stay adhered to the wood block. This heavy duty Velco was choosen becuase it could adhere to non-perfect surfaces. My guess is that the heat from the sun is causing the adhesive to loosen. The solution was to staple the Velco strip to the wooden block.
The light does not stay at full brightness all night long. By morning it is very dim. After a couple hours brightness is at or close to full. After four hours, brightness is noticeably less but still usable.