Transforming My Garage – 5 Years of Improvements
Introduction
I can’t believe it’s been 5 year since my last garage update. My garage build-out has been a really slow process always taking the back burner to many other home projects along the way. This update covers the period of time since that last update. Over those last 5 years, there has been incremental progress and then a big push in 2025 to the complete it. I think the end result is pretty amazing and I can’t believe that this is my garage.
I usually got inspired to work on it in the Fall months. I think the coming deadline of having to store my cars in there for the winter and have much reduced ability to be actively working in there was always a good motivation. I work best with a deadline.
I had been doing the drywalling of it in stages. In that last update in 2021 I had most of the walls done. The walls were relatively easy to do myself. I was able to quickly do most of the large areas which didn’t require much cutting and could be done from the floor. This made the whole project seem deceptively easy.

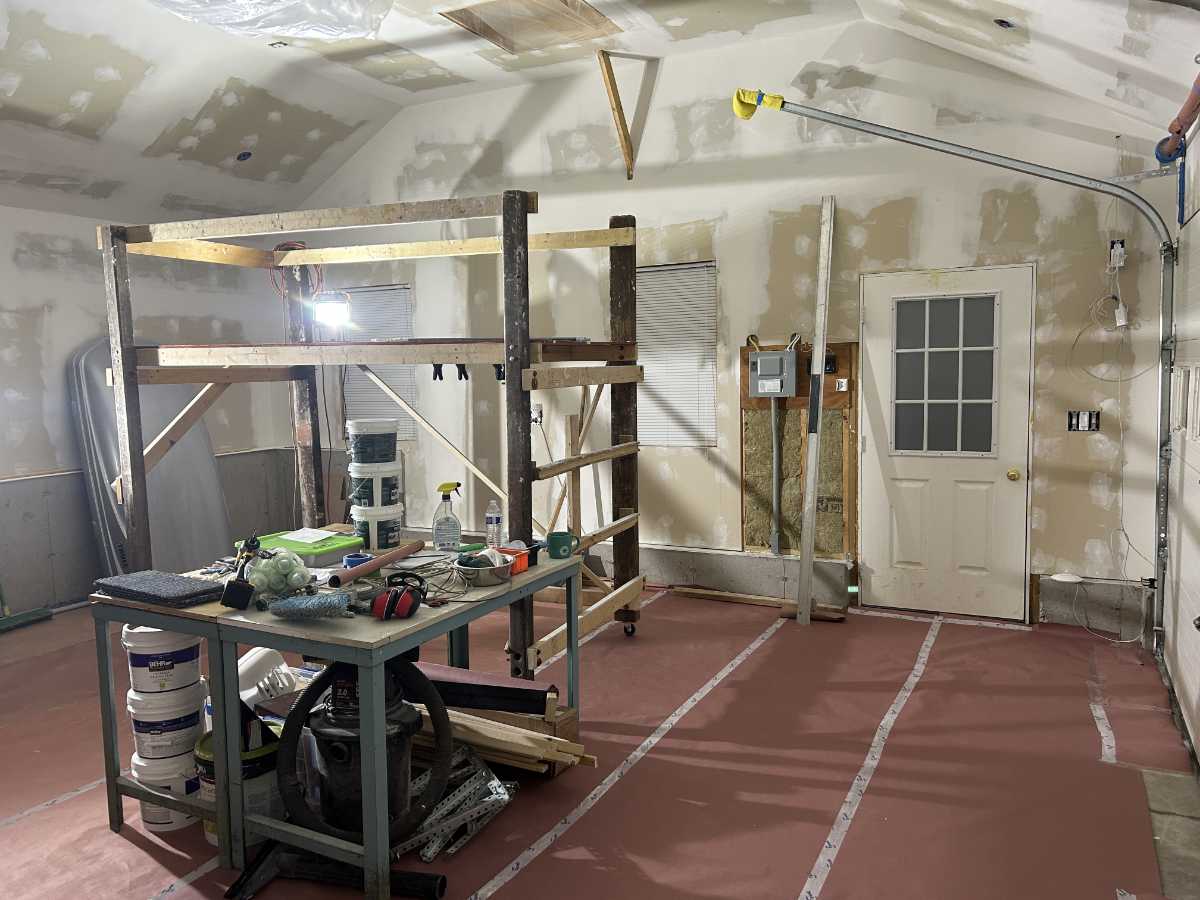
It stayed like this for several years as it got more and more cluttered. I put up furring strips in order to secure the insulation from falling down. I was pretty sure it wouldn’t move but, still, I thought this was simple enough to do and it added some peace of mind. I think that the exposed insulation resulted in a lot of extra dust in the air as evidenced by the amount of dust always on my cars.
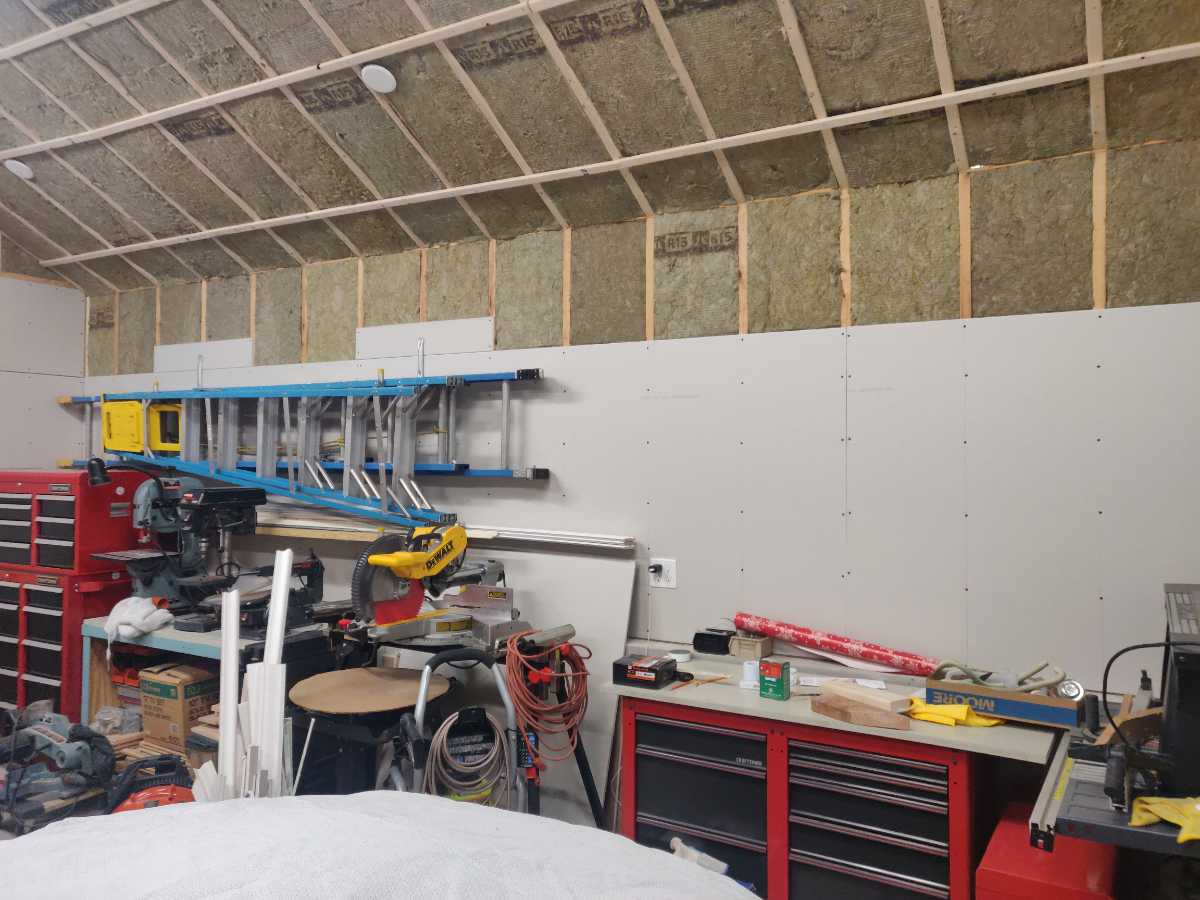
Two years went by with the garage in this chaotic state. My next pass was to drywall the ceiling. For this, I needed to rent a drywall lift. I did that in the fall of 2023. That work was done across a few weekends. I rented the lift for a day or two each weekend and completed the high part of the ceiling which is 10 1/2′ and also most of the sloped parts of the ceiling. I completed everything for which I thought I had needed the lift.
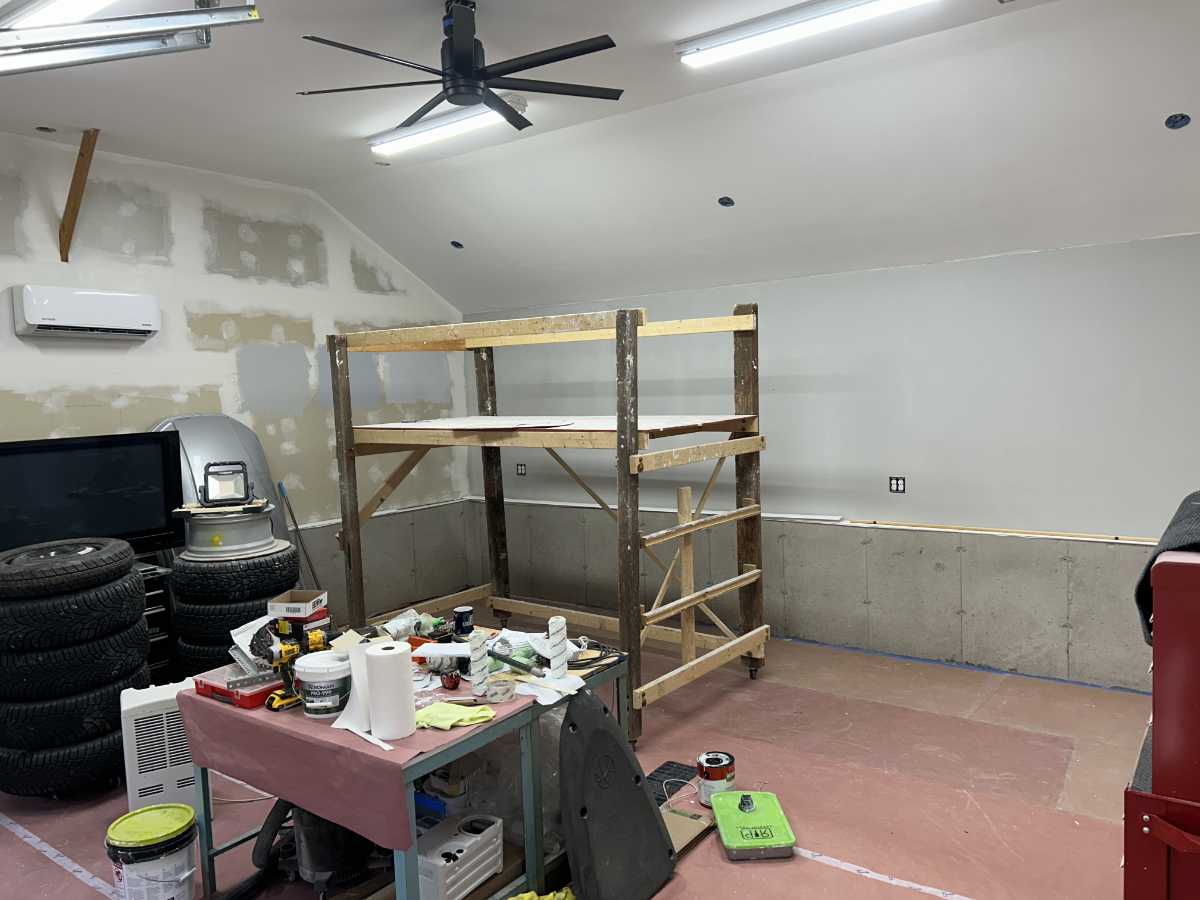
Probably one of the best and most useful things that I have ever made was the scaffolding that I used on this project. Having used just a ladder to do the hanging, taping and painting in my other garage, I knew that scaffolding would make those tasks much less painful. I knew that I would need scaffolding across a long period of time so renting was not an option. Buying was not either as it is very expensive.
Luckily, around the same time that I decided that I wanted scaffolding, I had just disassembled a playscape and had a number of cedar posts. I purchased around 10 2″x4″x8′ boards and a sheet of 1/2″x4’x8′ OSB in order to complete the construction. I used reclaimed bolts and other hardware from the playscape to put it together. I think it took me almost two days to build it by myself.
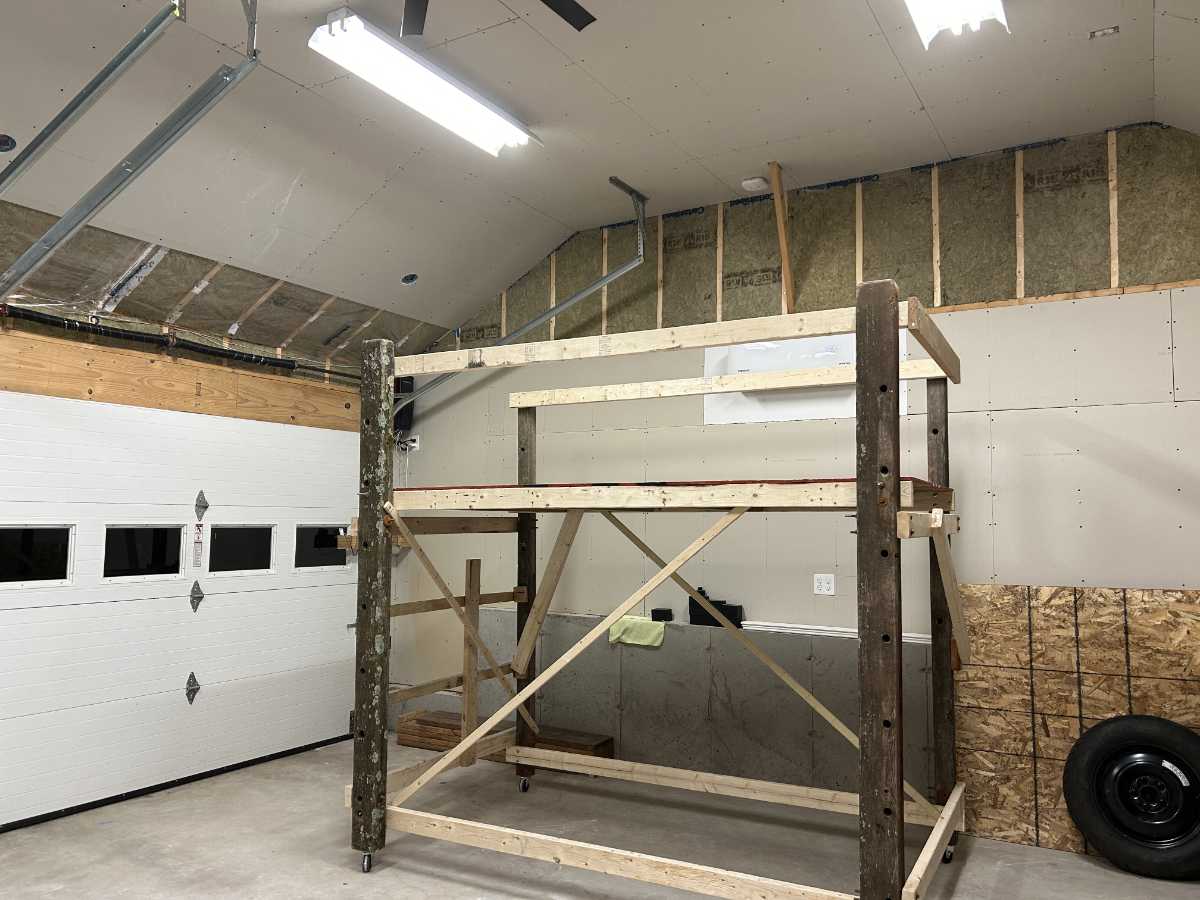
On one end I added a rudimentary ladder. The whole thing was a little shaky at first but I had some 2×4’s and furring strips left over that I used for cross bracing. It was amazing how the thin little 1×2 furring strip cross braces made this thing rock solid. In order to move it around, I added casters. I bought a furniture dolly at Harbor Freight and repurposed the casters. Buying a furniture dolly was cheaper than buying 4 casters separately.
The end result was a pretty sturdy setup giving me an entire 4’x8′ area to stand on with the ceiling easily within reach. The only thing I wished was different was that I would have really liked locking casters. They would have certainly been worth the additional cost.
Finishing the walls
After 2023, I had just the top 30% of each wall and some of the ceiling closest to each wall left to complete. But, it sat undone for all of 2024 and most of 2025.
In October of 2025 I decided that this project needed to get completed. I was really tired of it not being done the way I had envisioned it back when I had the garage built in 2015. I wanted it organized and painted with flooring and cabinets like many garages I had seen online and had been coveting.
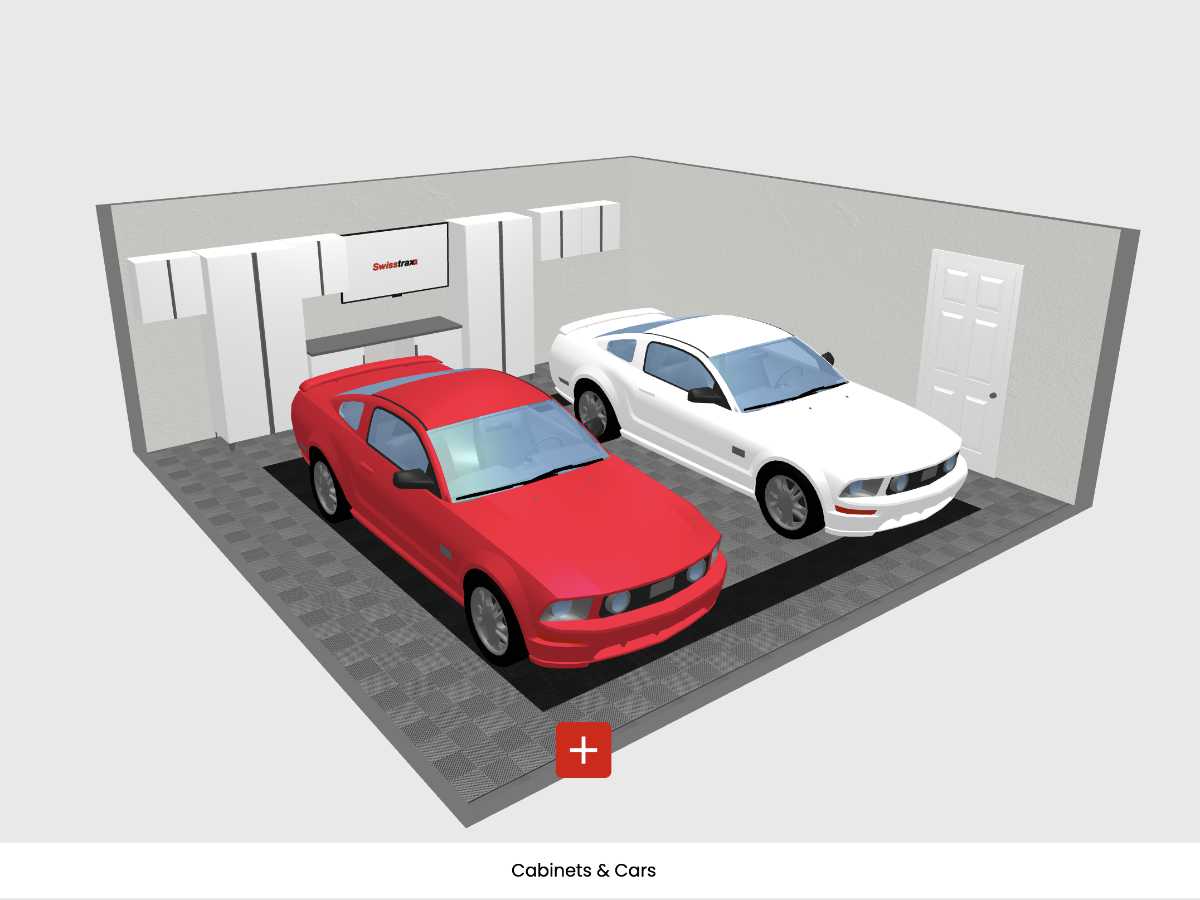
I made a list of what I needed for my “dream garage” and established a budget. I wanted a clean and modern look. I wanted some cabinets but I didn’t want to spend thousands of dollars and, with a 22′ x 22′ garage, I didn’t have a lot of space to work with. Having a budget in place, I went to the designer tool on the Swisstrax flooring site for my inspiration. Besides the flooring, it let me add other details such as doors, cabinets and cars.
With that vision as motivation, I returned to working on it at the end of October 2025. I completed hanging the drywall with plans to finish that, tape it and paint it and to then finish out the space as I had wanted all those years ago when I first had the garage built. I knew it would be a lot of work but, like everything I do, it went much slower than expected. I took a couple weeks off from work to focus solely on it and I worked nearly every night and weekend on it for almost three months. The scaffolding was indispensable for the drywall hanging, taping and painting.
Through the taping and then the painting of the ceiling, I had been working with just work lamps having had to remove the lights from the ceiling. Once the ceiling was painted, I immediately installed the new lights. Had I known how great the lighting would be with the new lights, I would have only taped and finished the ceiling, installed the lights and then taped and finished the walls. I was a little concerned with my taping job once I saw it under the new lights.
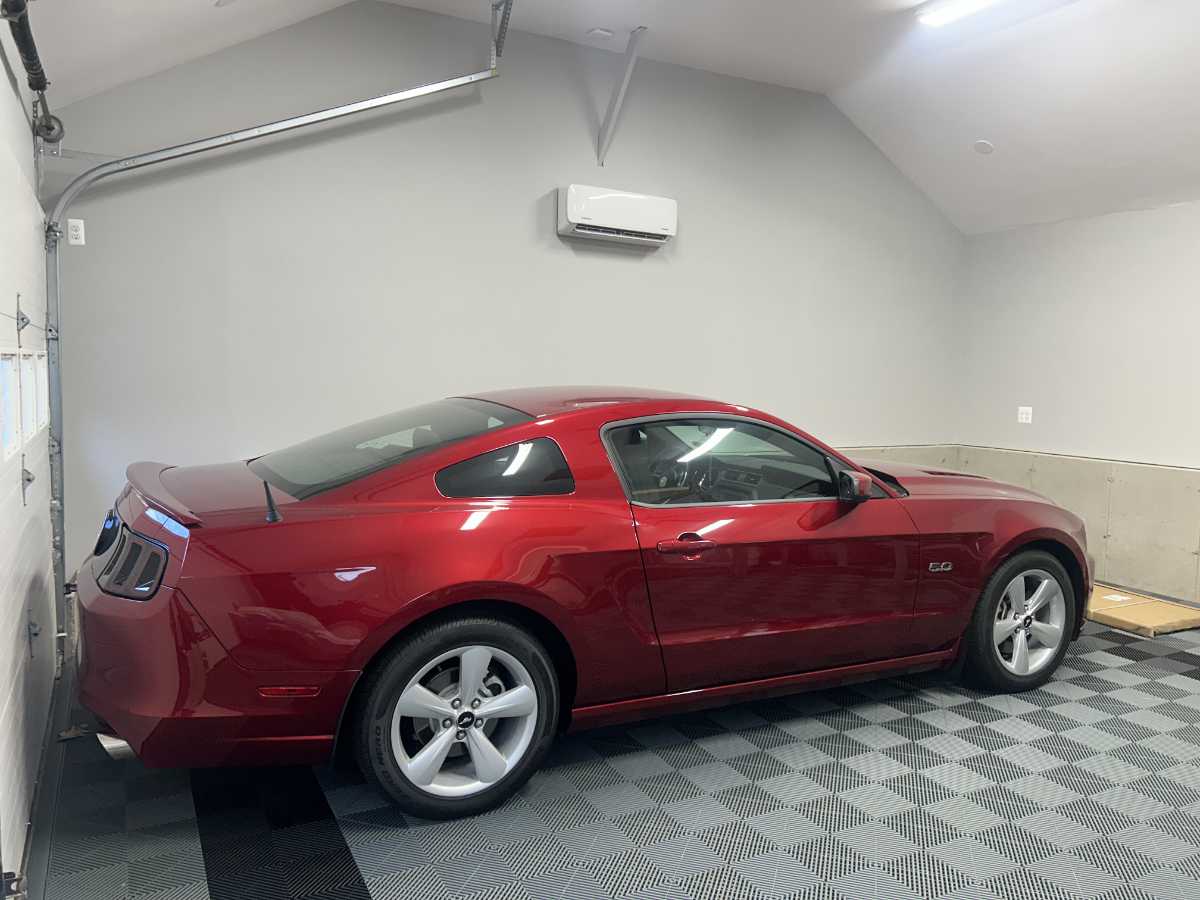
I went with 4 PrimeLights 4FT 4 lamp Stingray Gen 2 fixtures purchased through Obsessed Garage. They are really much better that the flourescent fixtures I had before. My only criticism of the lights is that they do not allow dimming. I didn’t know that when I purchased them. I had watched a review of the Gen 1 version of these lights which did allow dimming. I didn’t know that they’d removed that feature for Gen 2.
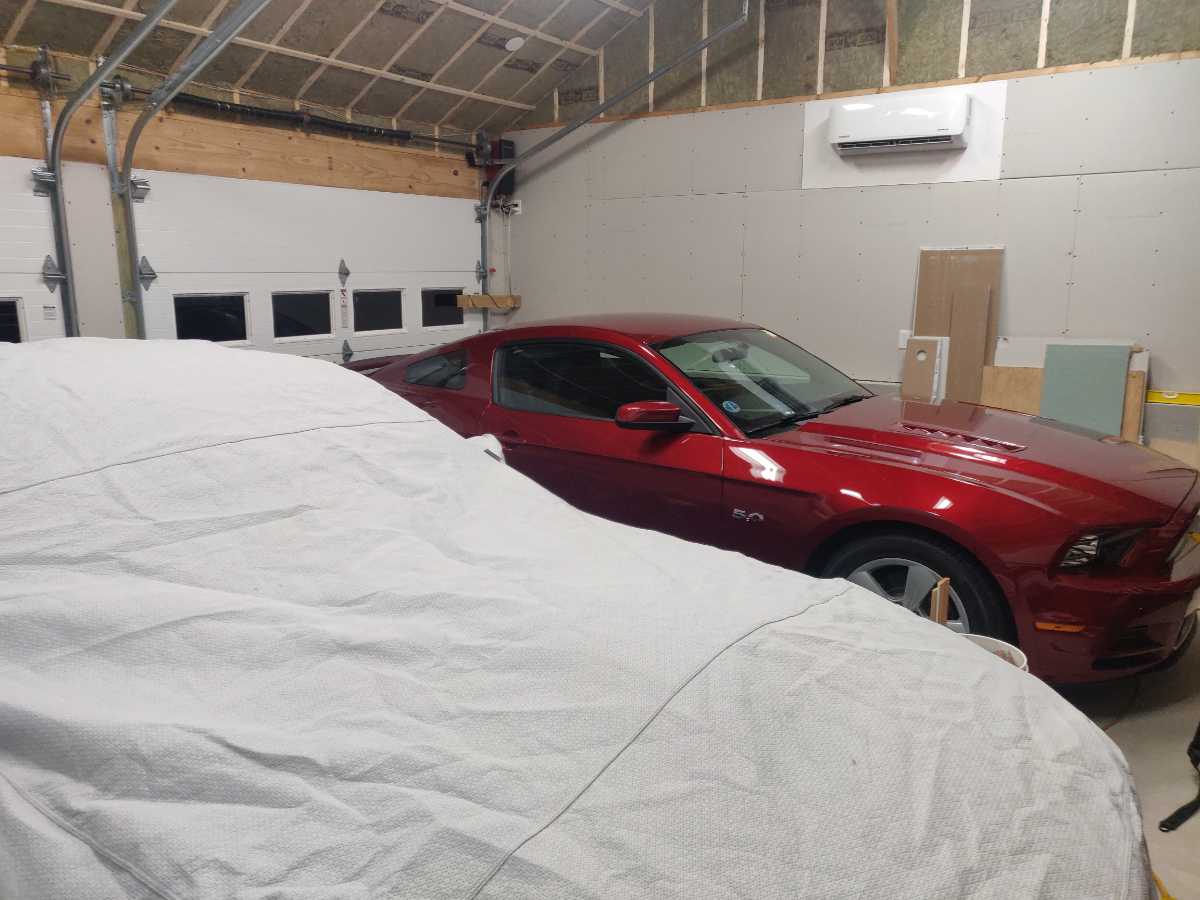
Through this process, I still had a lot of stuff in the garage – a car top carrier, two sets of snow tires, my largest rolling tool box, a rolling tool cart and two work tables. Moving it out of the way of the scaffolding was a constant struggle. While it was certainly less stuff than I had in there originally, if I had to do it over again, I would have removed more of it.
Flooring
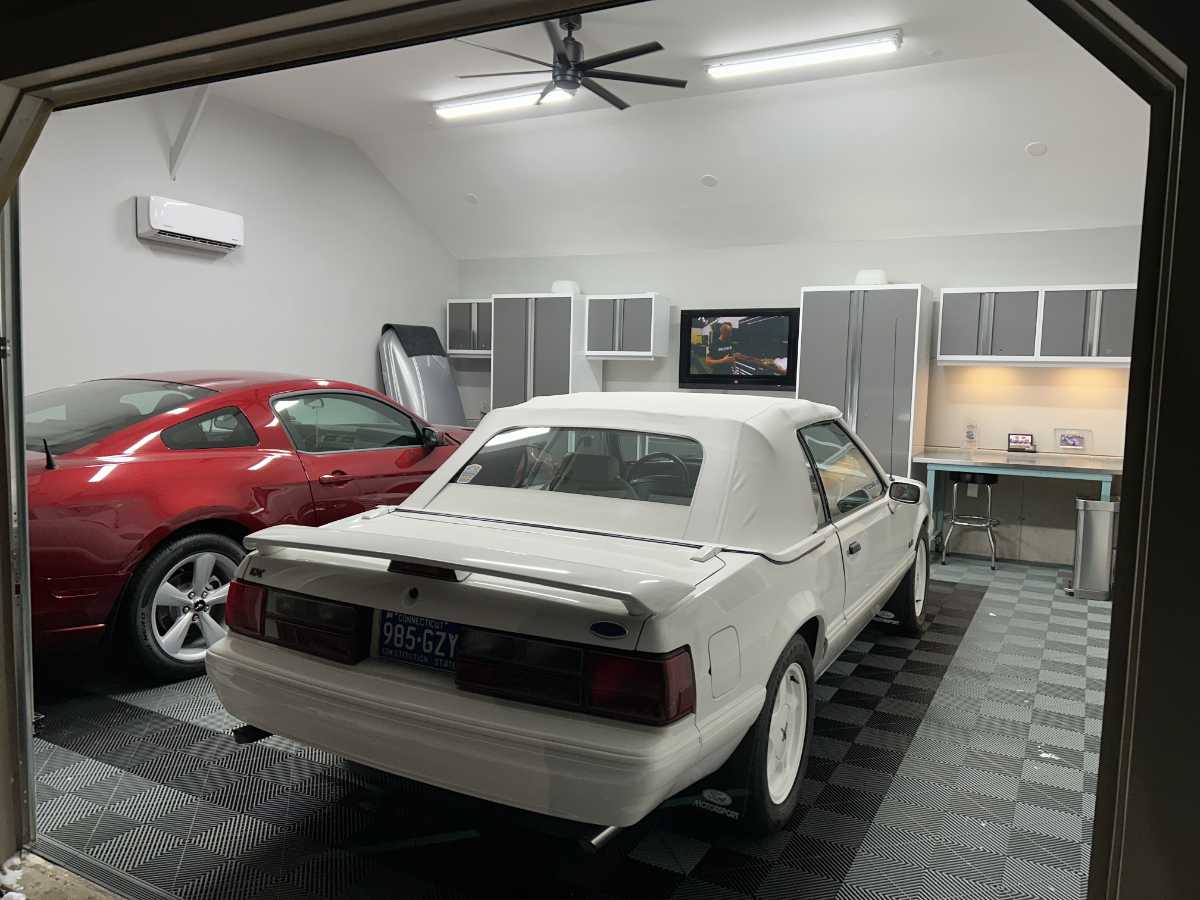
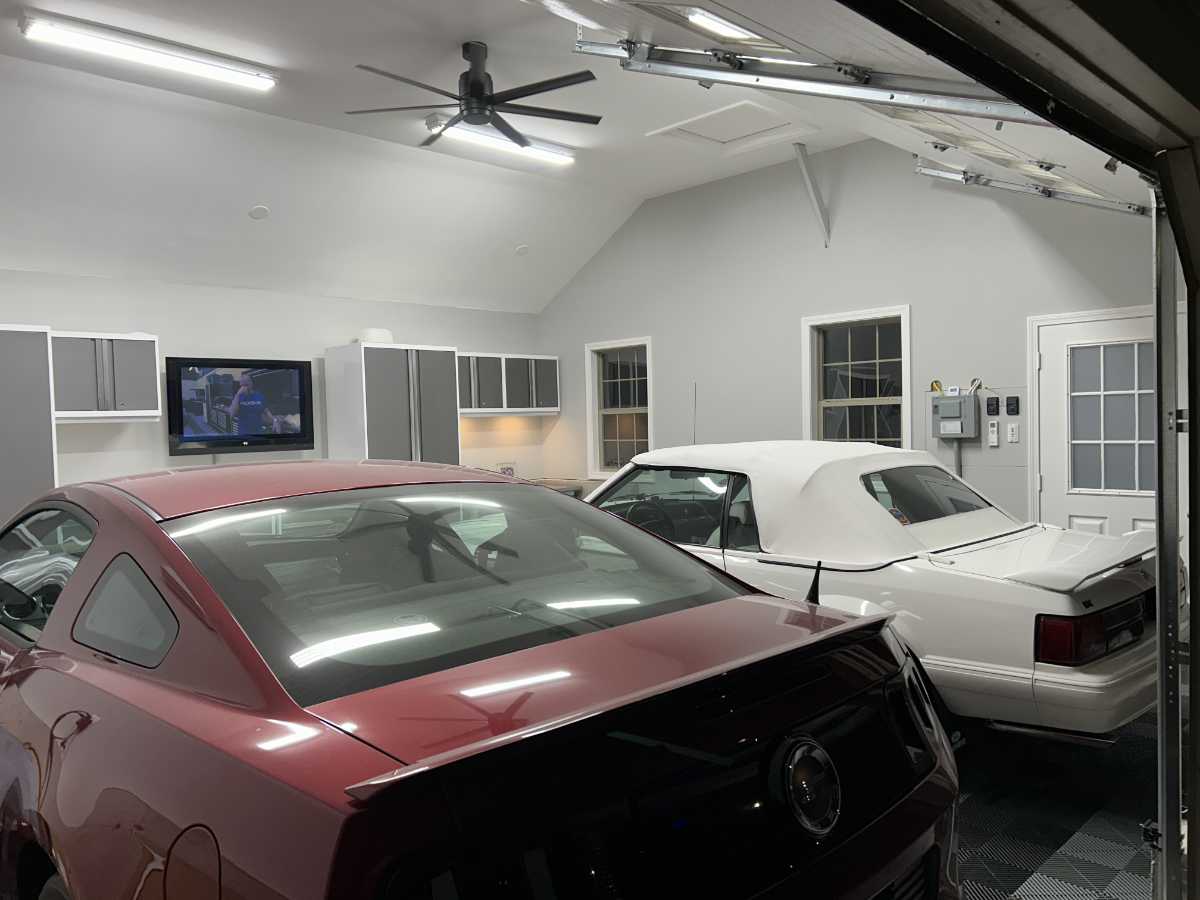
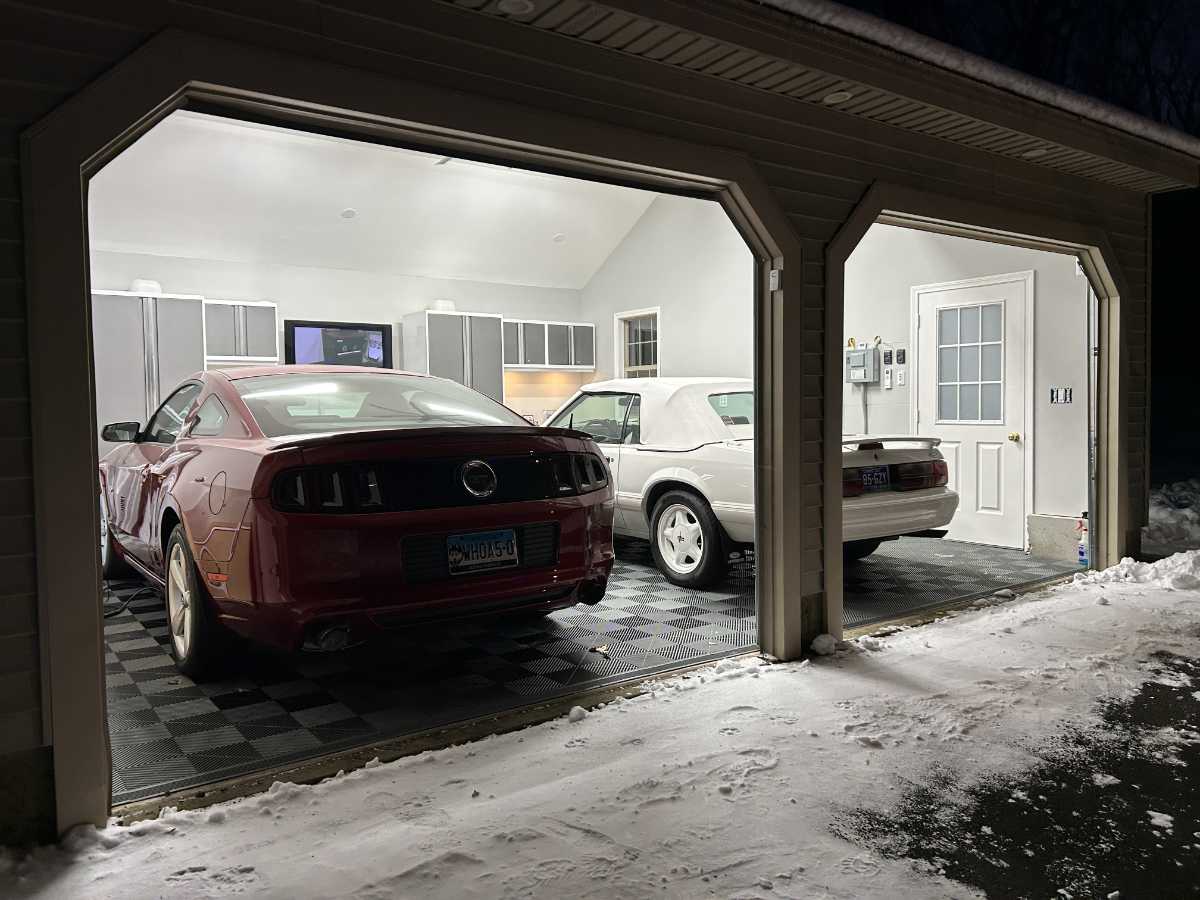
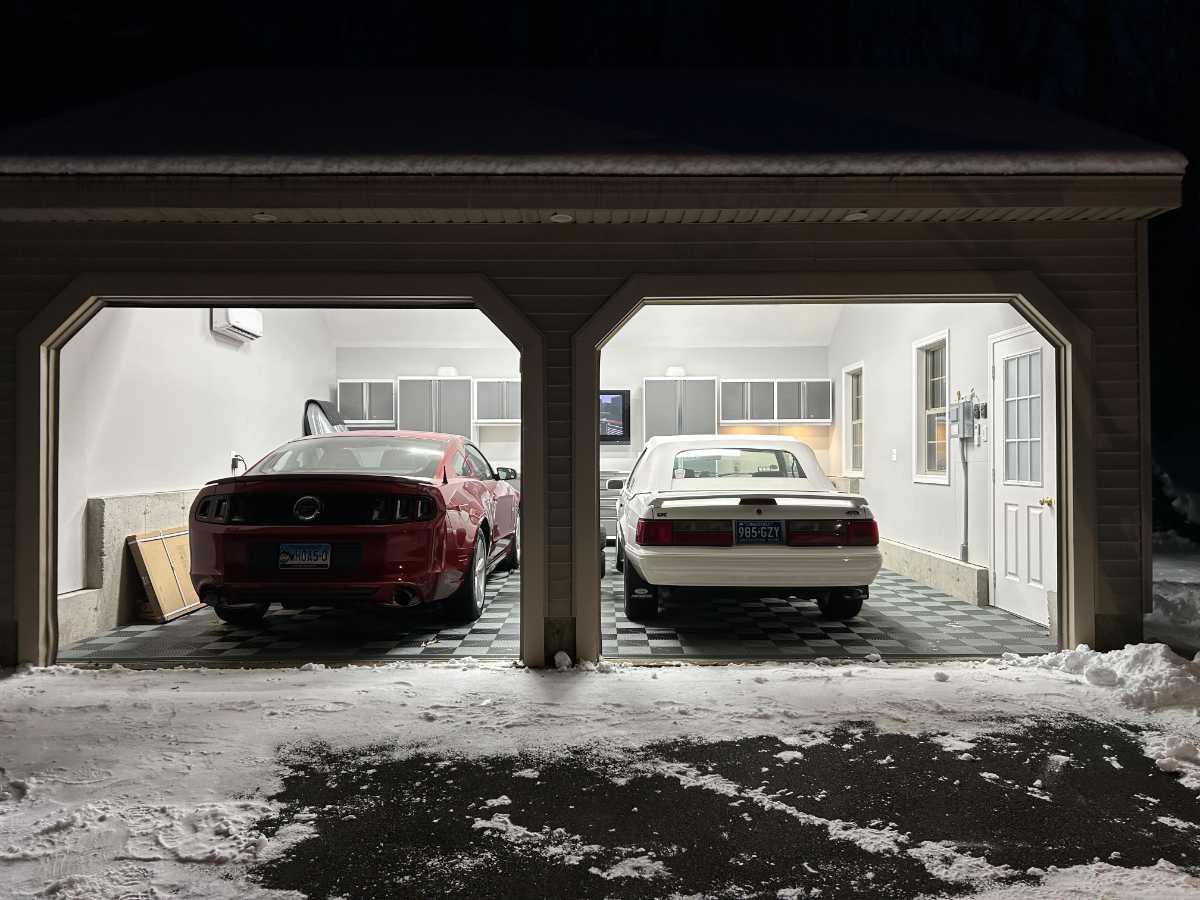
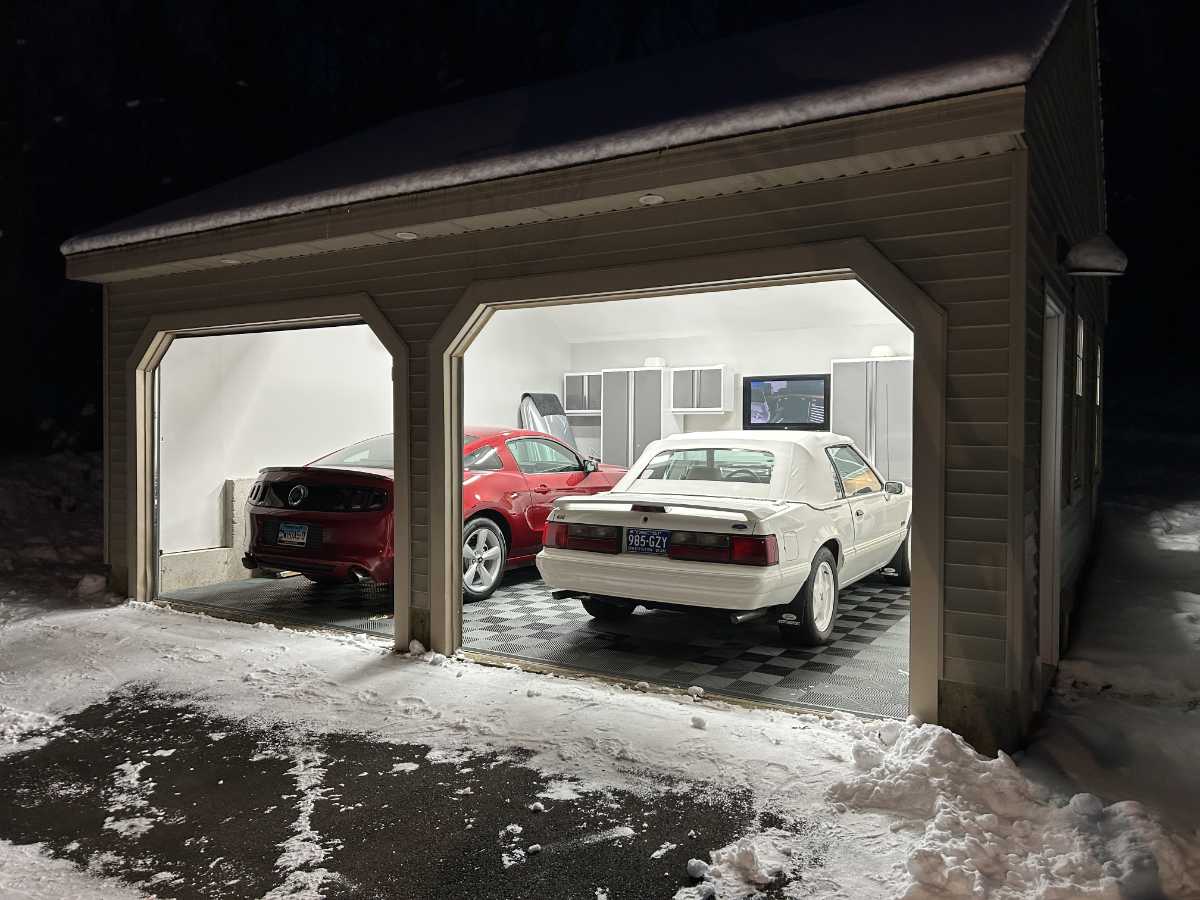
Once the painting was complete, I moved on to flooring. For flooring, I installed Swisstrax Ribtrax Pro. It was possibly the most satisfying step in my entire garage transformation. The time required was low (only a few hours) and the level of transformation was huge. I went with slate grey with a jet black accent border. The jet black border was strategically placed so that, if my cars were inside of it, the chance of hitting a car door on the wall or the entry door on the car was not likely.
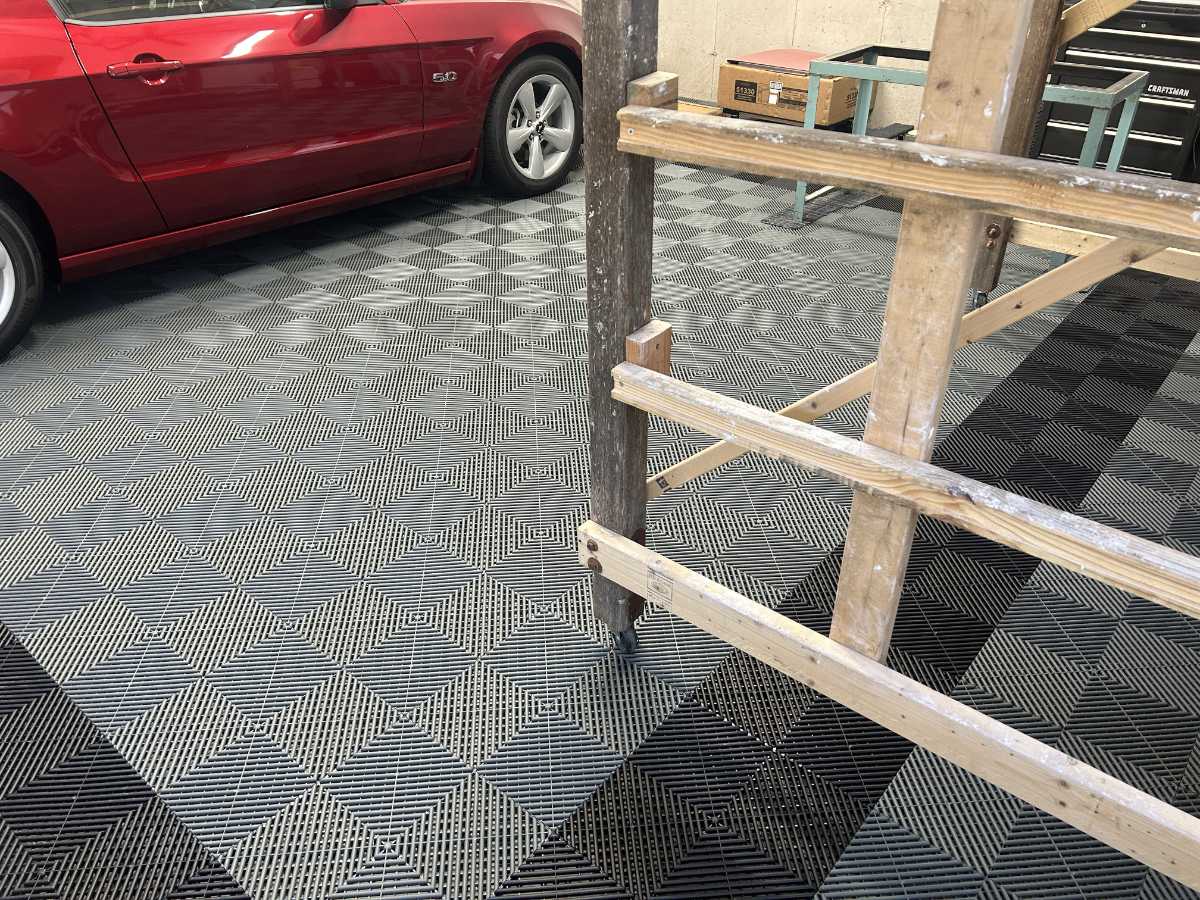
Time will tell how I like it long term. I’ve already dropped some things that went through it. A magnet was very useful in getting them back. I need to get a tile puller tool so that I can easily remove one or two should I need to get under them. I love how they feel to walk on. They are solid and there is hardly any noise. It’s also nice to be able to get on the floor (to say route a trickle charge cable under the car) and not to be on bare concrete. This is a really big upgrade.
Cabinets
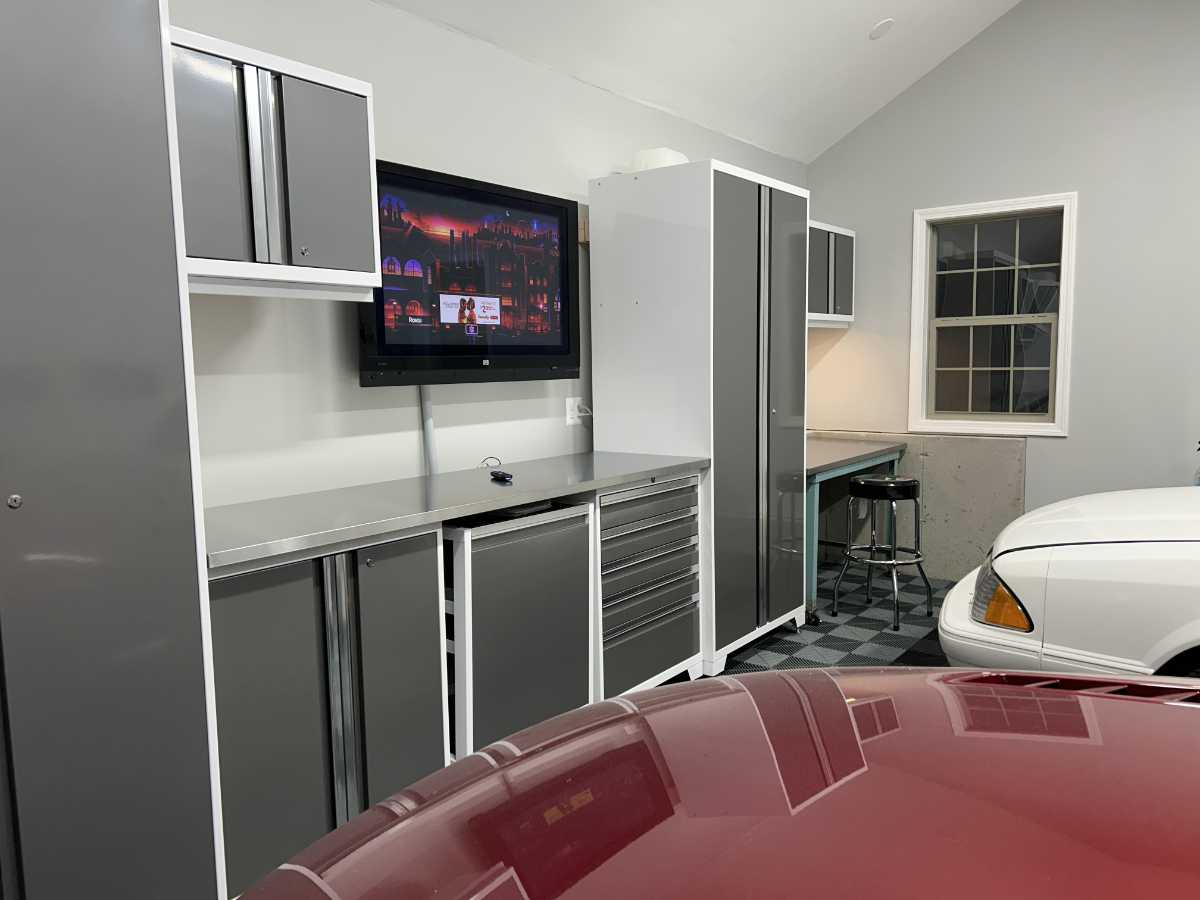
For cabinets, I ordered NewAge Pro cabinets through Costco. These got great reviews and were kind of middle of the road in terms of what is available. They are not the budget spec nor the 10’s of thousands of dollars of the premium brands.
There was a whole drama with the delivery and ultimately a second shipment was sent after the first was returned as undeliverable. The first shipment made it to within just a few miles from my house but the shipping company refused to deliver it based on their assessment of my street using Google Maps and Google Streetview. I tried to convince them otherwise without success.
Technically my delivery was to be curbside. They didn’t even need to bring it up my driveway. The whole palletized shipment was relatively tall at 98 1/2″ so it couldn’t be brought in their smaller box truck. It had to be brought in a “pup trailer” which is a short box trailer but tall enough to handle the pallet height. They were concerned about low trees.
I went so far as to send them a video of the approach to my house driving up my street but was never able to make any progress with them. I posted the video on YouTube as private and, noting the view count, they never even looked at it. After almost two weeks of attempts to get it delivered, my cabinets were sent back to the manufacturer.
A second shipment was sent through a different carrier. This delivery driver was the best. He also drove a truck with the exact same “pup trailer” configuration with which the first carrier refused me. This driver was so good that, even though he didn’t have to, he backed up my driveway and dropped it in front of my garage.
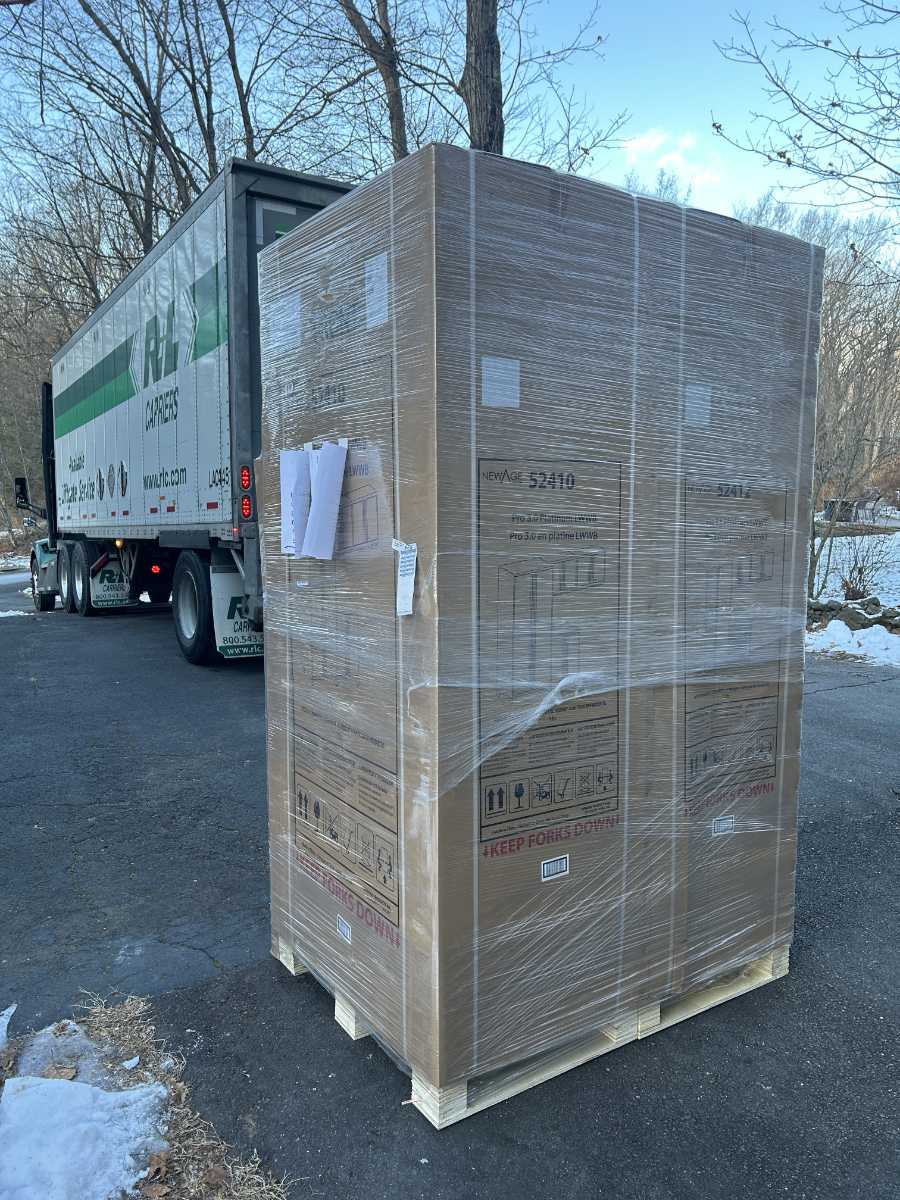
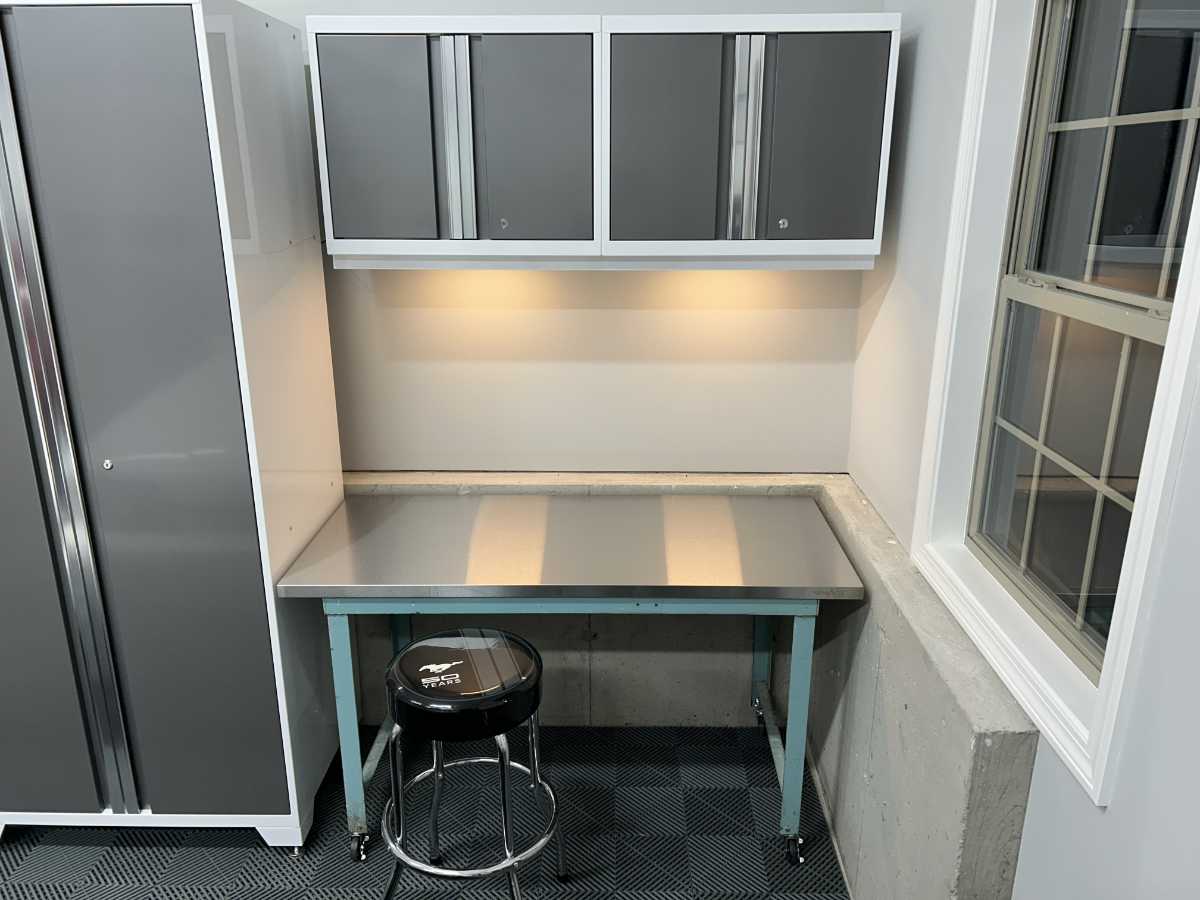
The cabinets I ordered were discounted for the month of October. They weren’t the exact configuration I wanted but, with the $600 discount being offered, I decided to go ahead with them. I also ordered directly through NewAge a mobile utility cart and an 84″ work top since setting up the cabinet array with the two 56″ worktops would have been just a little too long for what I wanted. I wanted some space on either end of the cabinet array and to have an area that I could use as a desk.
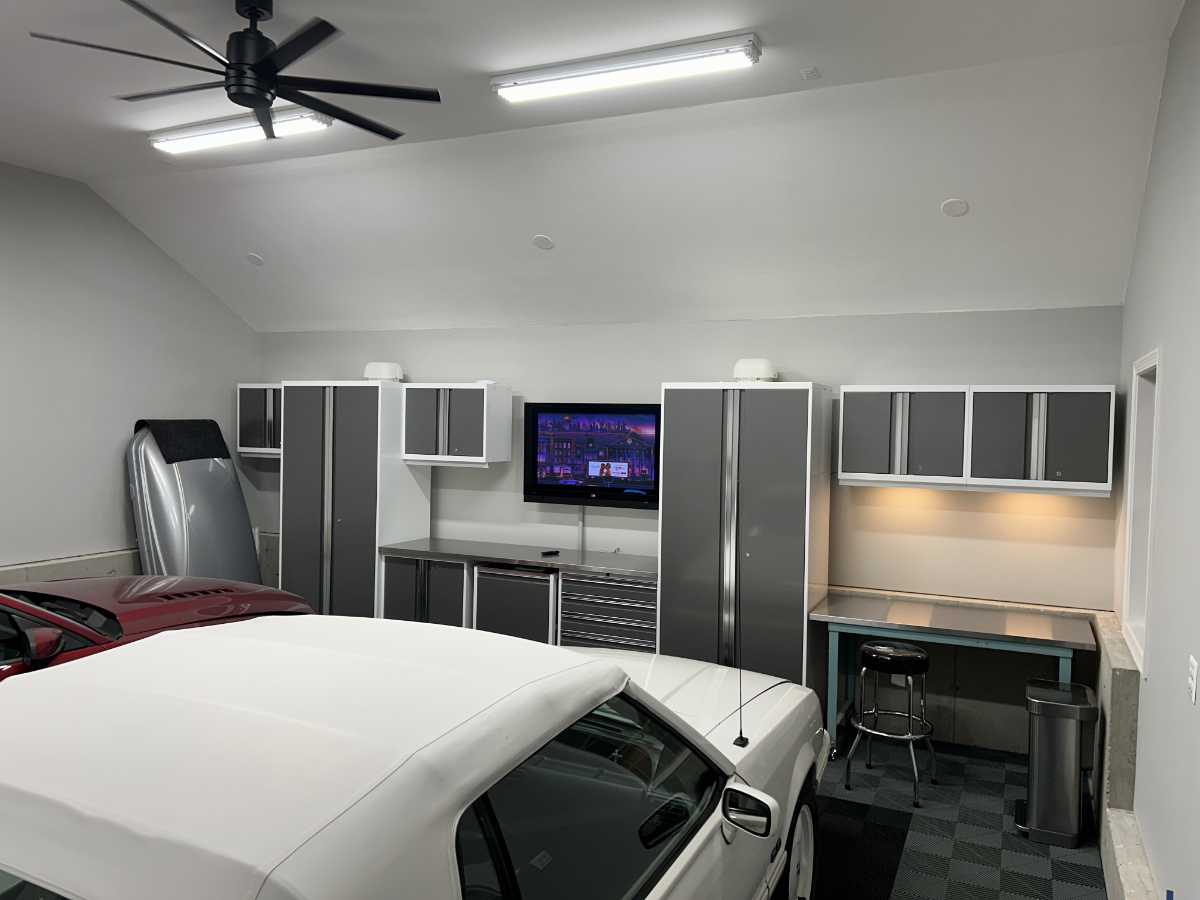
The end result was even better than I had envisioned. It’s mostly new but I incorporated a couple old things into it –
- My first flat screen TV, a Panasonic 42″ Plasma rebadged as the HP Pavilion PL4200N. I purchased this almost 20 years ago (Feb. 2006) for $2,400.00. I still like this thing. It has incredible contrast and black levels. The cabinet is so big that it has decent speakers including (I think) a subwoofer. I don’t watch a lot of TV in the garage so it is perfect as it cost nothing to add – I already owned it. It has a Roku attached to it which brings it into the 2020’s.
- An old table made of angle iron that serves as a desk (or work bench). It is one of several that my Dad got from some place that he worked. It is still painted as it came to me and has developed a patina (by that I mean rust). It is now topped with one of the original 56″ work tops that can with my the cabinet set.

Finishing touches
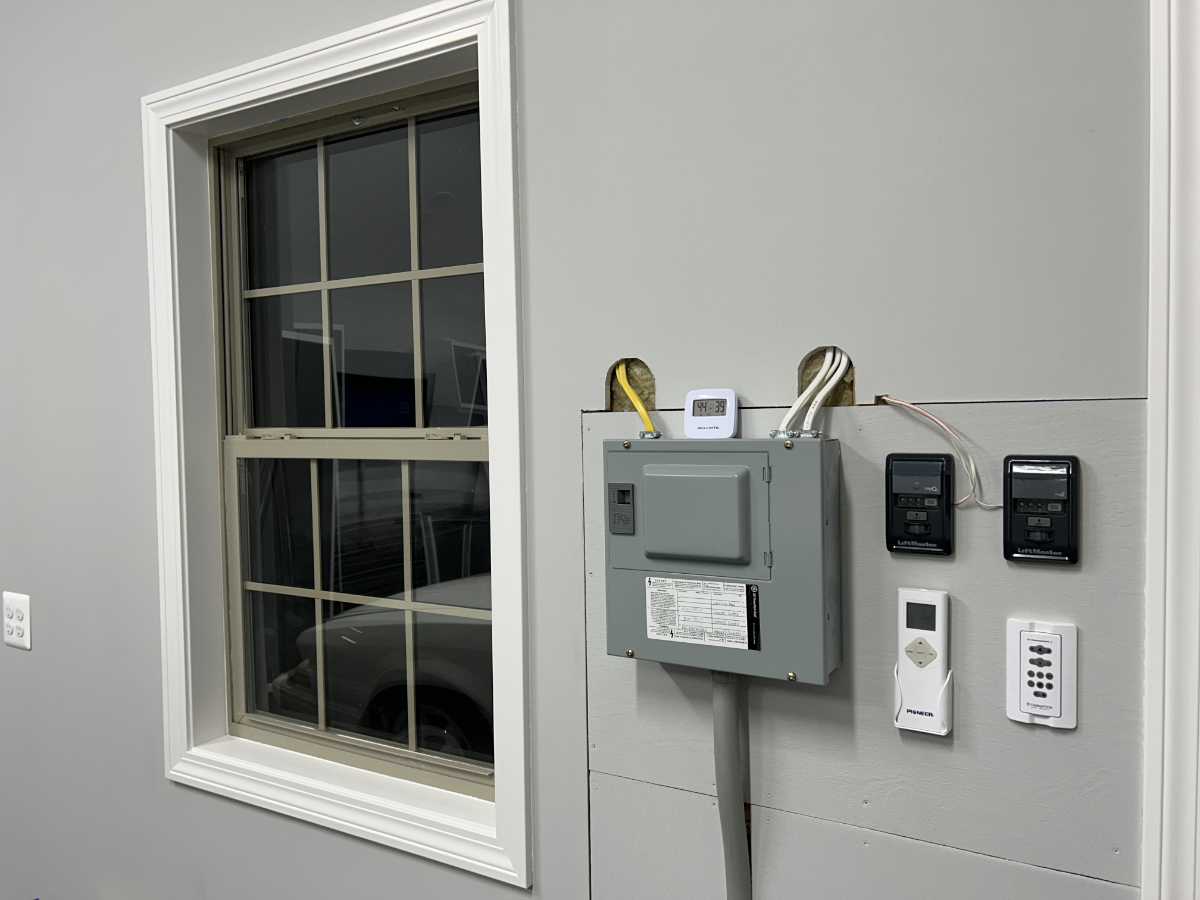
After the cabinet install, I spent a bunch more time on some finishing touches. I am pretty proud of my work in trimming out the windows and door. I also had to deal with the area around the electrical panel. I backed the whole area with plywood replacing the little piece of plywood on which my electricians had mounted the electrical box. Ideally, I would have wanted this all to be drywalled with no seams. But, with it being plywood, I am free to mount other stuff on there like my garage door controllers, my minisplit remote and my fan remote. And, hey, it’s only a garage.
Honestly, “it’s only a garage” is something that kept repeating in my head as I finished each phase of the project and stood back and noticed the imperfections. I wanted everything to be perfect. I do not do this by trade and I’ve hired people to do parts of it but have frequently been disappointed in the level of work done by them. I think that sometimes I can do better because I don’t pay myself by the hour. I’ve spent literally hundreds of hours on this.
As it stands, I’m positive that it is better than every other garage in my neighborhood and probably 99% of garages in general. I want to leave the doors open so my neighbors can see how good it is!
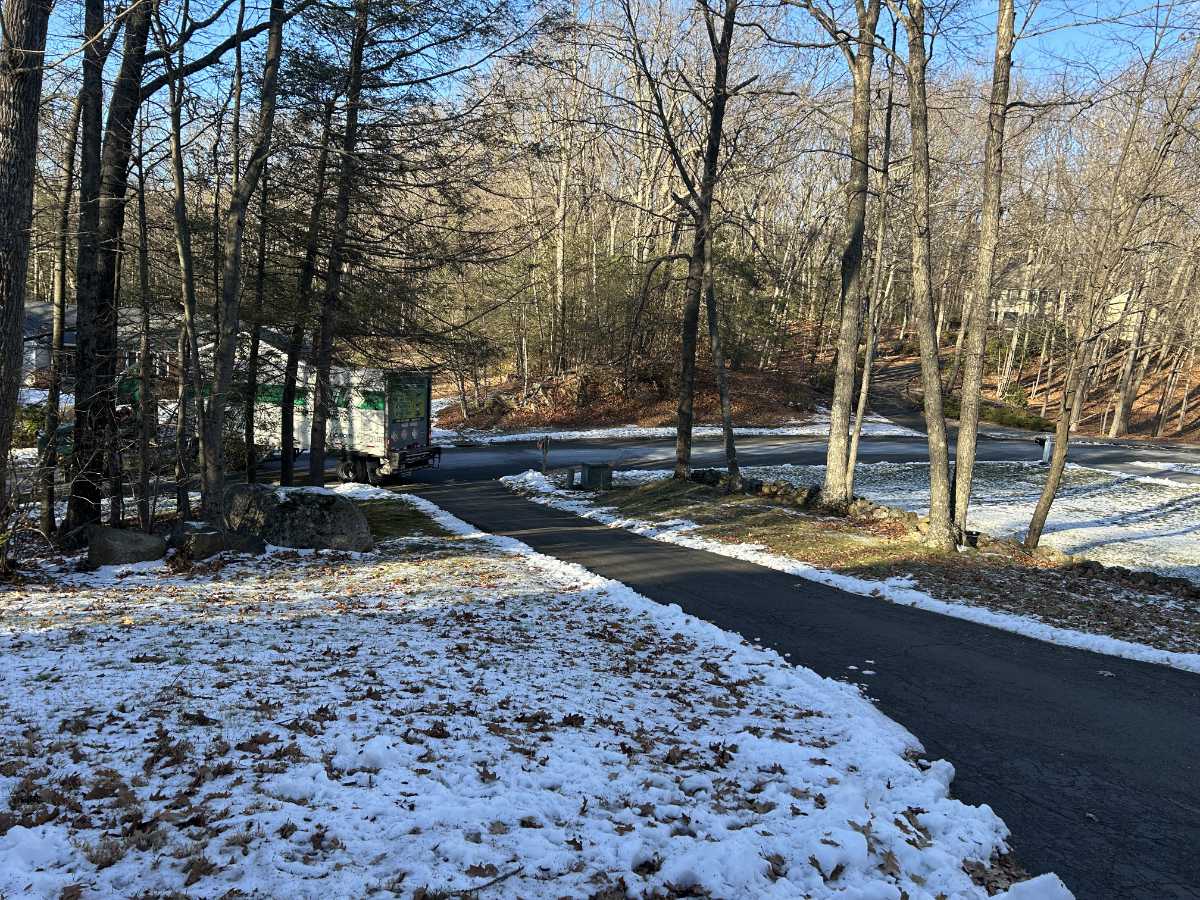
Finally, I’ll end with some exterior shots taken of the garage as winter has taken its hold. Those with a keen eye will notice how dusty the 2014 has gotten since I pulled it into the garage after the floor went down and it has sat unmoved.
Products used
- PrimeLights 4FT 4 lamp Stingray Gen 2 fixtures purchased through Obsessed Garage
- NewAge Products Pro 3.0 Series Storage Cabinet 10-piece Set in white with stainless steel top
- NewAge Pro mobile utility cart
- New Age Pro 84″ work top
- Swisstrax Ribtrax Pro flooring tile
- Paint from Home Depot – Behr Titanium which is close to Benjamin Moore Harbor Gray
- Liftmaster 8500 garage door opener
- Fanimation Blitz 56″ fan